Materials:
Let's go! (Note: This tutorial was previously published on my old website. I've kept the original photos and added a little more to the instructions. ) If you wish to ink or color your doodle after it is done, be sure to use very light pencil lines. I used dark lines for the photos to help them show up better (graphite is hard to photograph). The lighter the lines, the easier they will be to erase for a cleaner finished drawing.
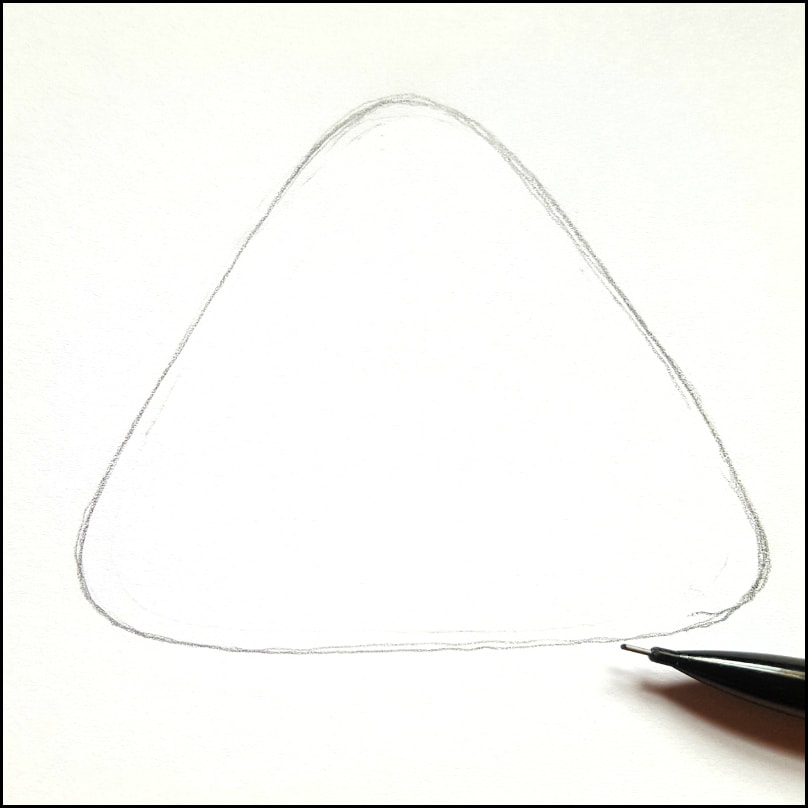
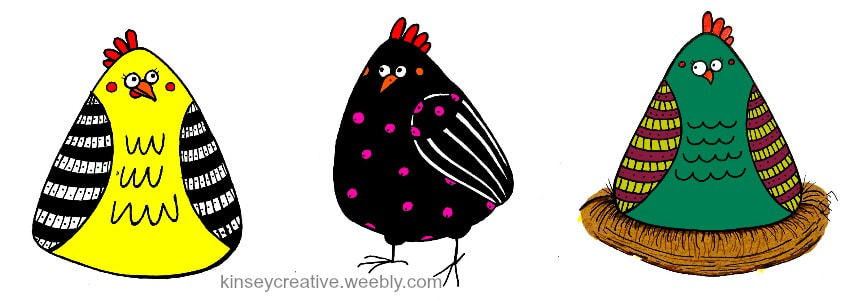
Step 1. Outlining the Body
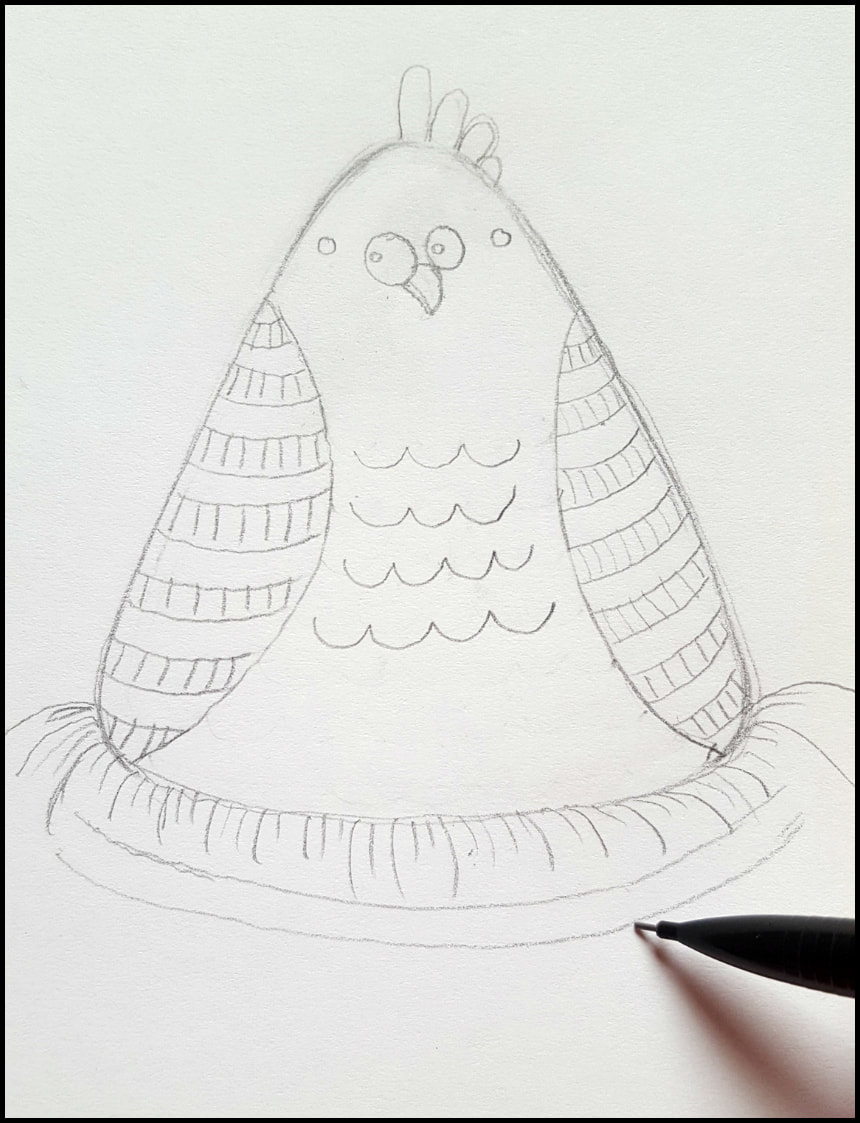
First you draw the basic shape of the body. Since this is a doodle, or "cartoony" chicken, we aren't going worry about the real shape of a chicken. This is just a triangle with rounded corners. Think of it as a rather soft piece of candy corn. (It also looks like a guitar pick.)
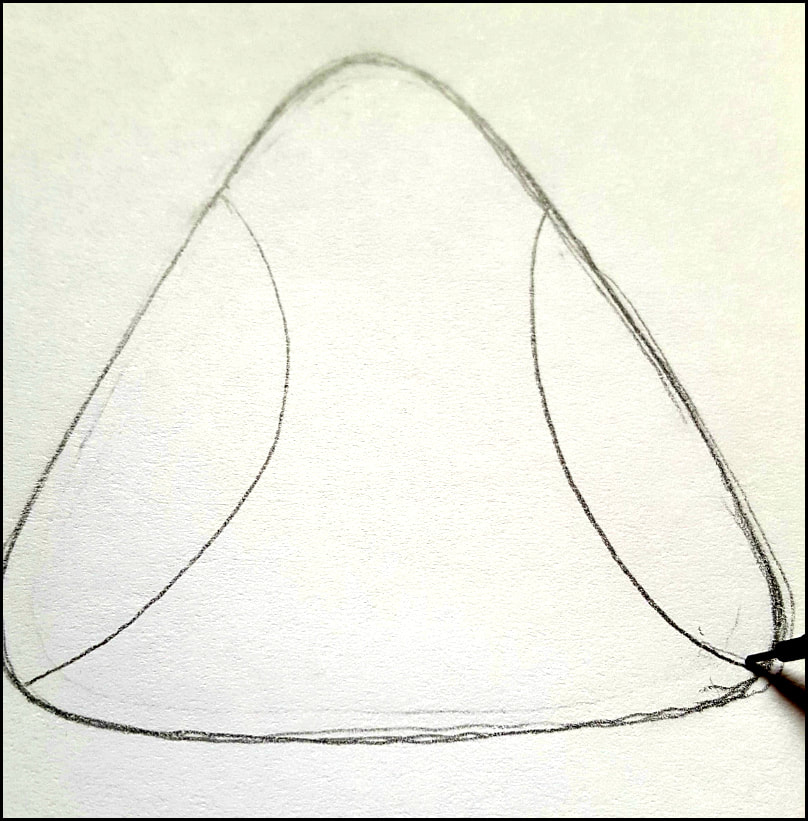
Step 2. Wings
Starting at the "shoulders", draw half ovals on each side (parentheses) for the wing shapes. They end near the bottom corners
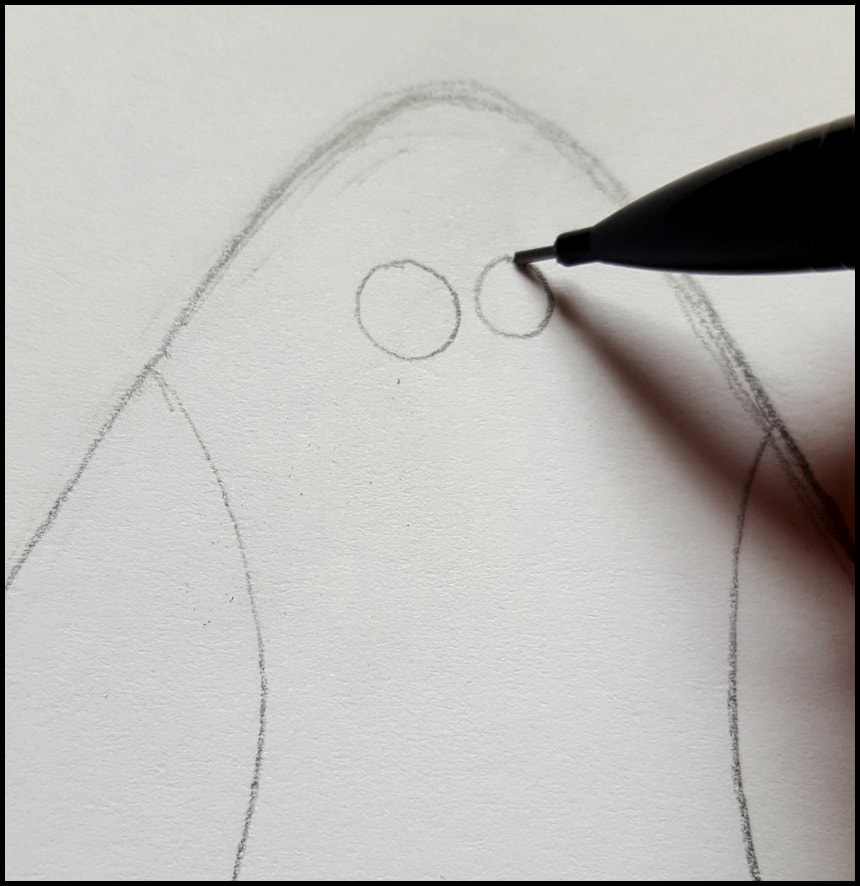
Step 3. Chicken Eye Balls
In the top part of the hen's body, draw two circles for the eyes. Make sure to leave a bit of space between them for the beak. I used mismatched circles to give this chicken a silly expression.
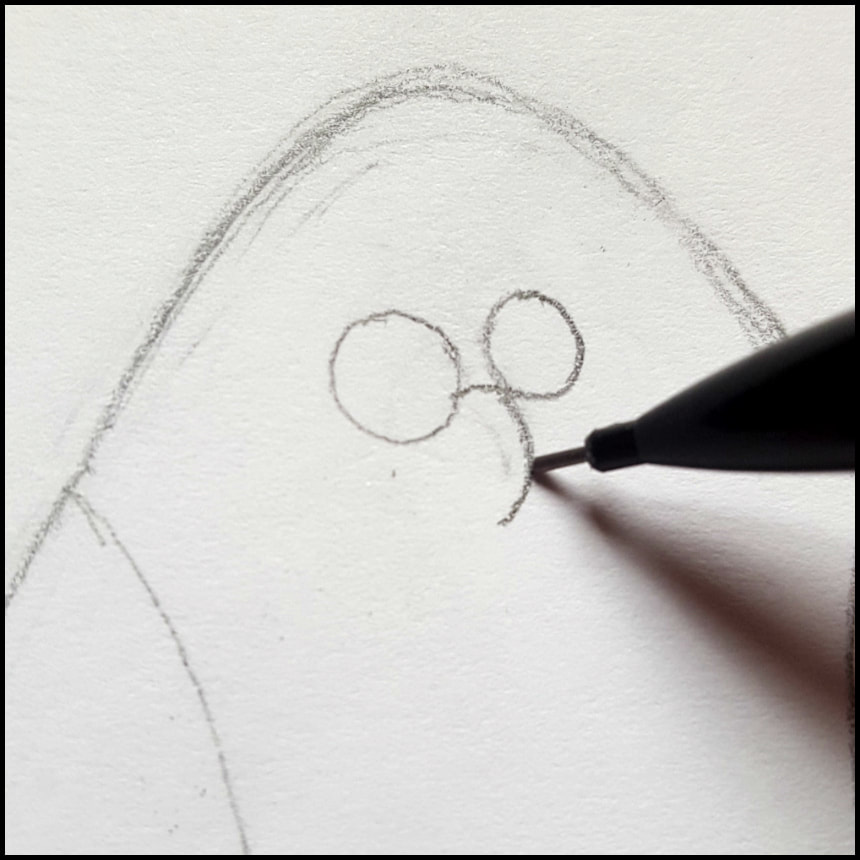
Step 4. Beak
Between the eyes, draw a slightly curved line. Then draw a second line downwards to create the beak curve.
Finish by connecting the tip of the beak to the second eye. The beak kind of looks like a slice of pizza.
Step 5. Wing Details
Draw a few stripes on the wings. These are just curved lines, and they don't have to be even.
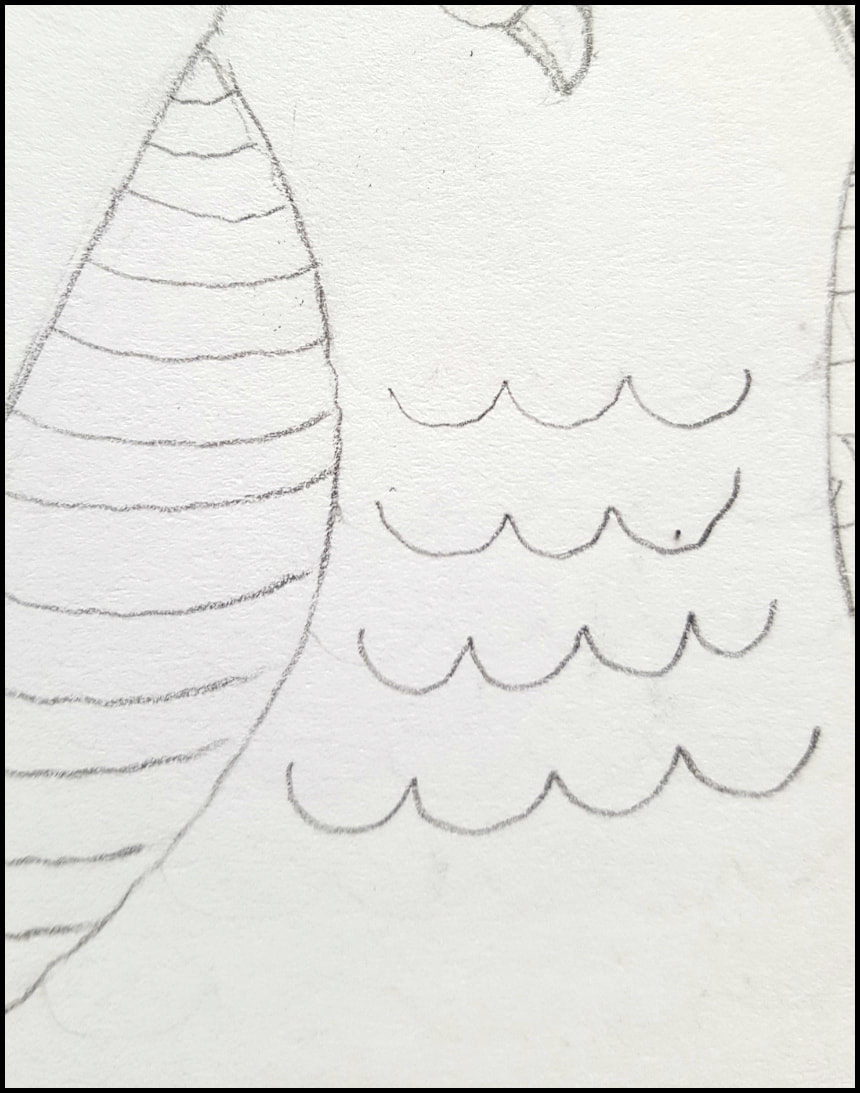
Step 6. Chest Feathers
Create the chicken's feathery chest with a few lines of "waves" (or scallops). Again, since this is just a doodle, there is no reason to worry about it looking "real" and you certainly don't have to draw in each and every feather!
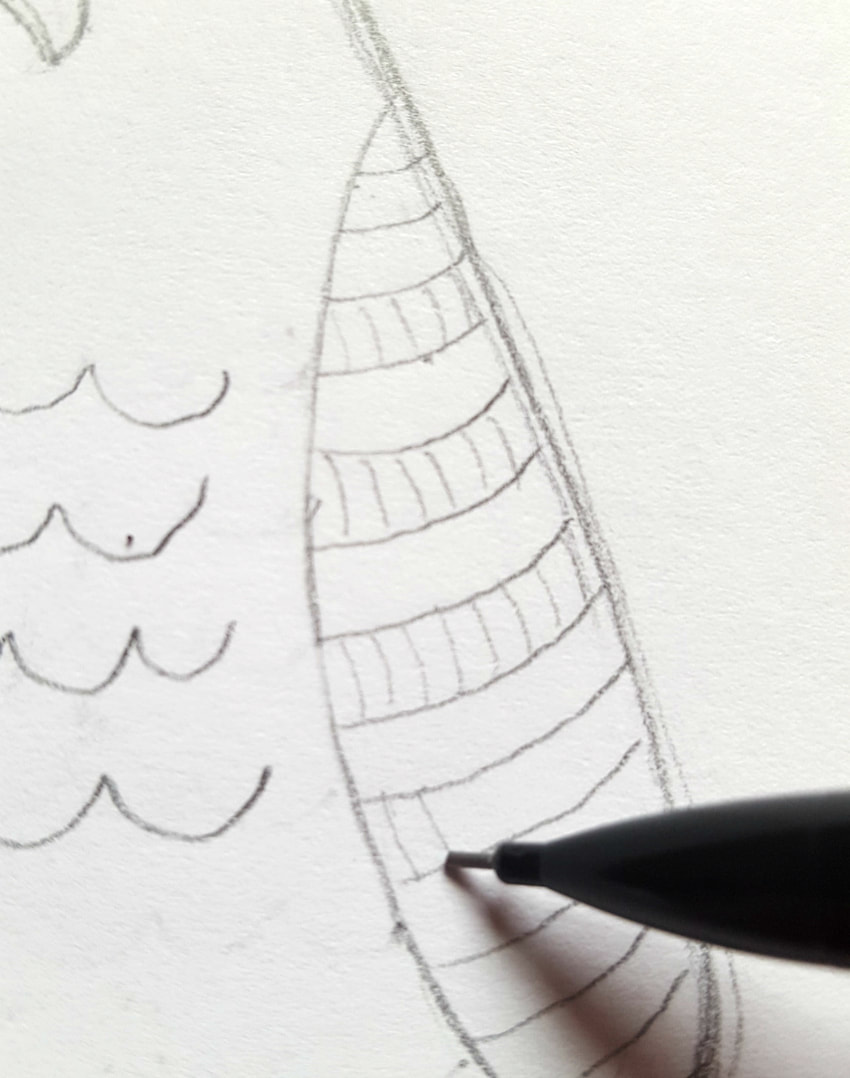
Step 7. More Wing Details
Draw several vertical lines on every other stripe of the chicken's wings. This is optional, but it gives the wings a little bit of pattern and texture. And if you like coloring it gives you something else to fill in.
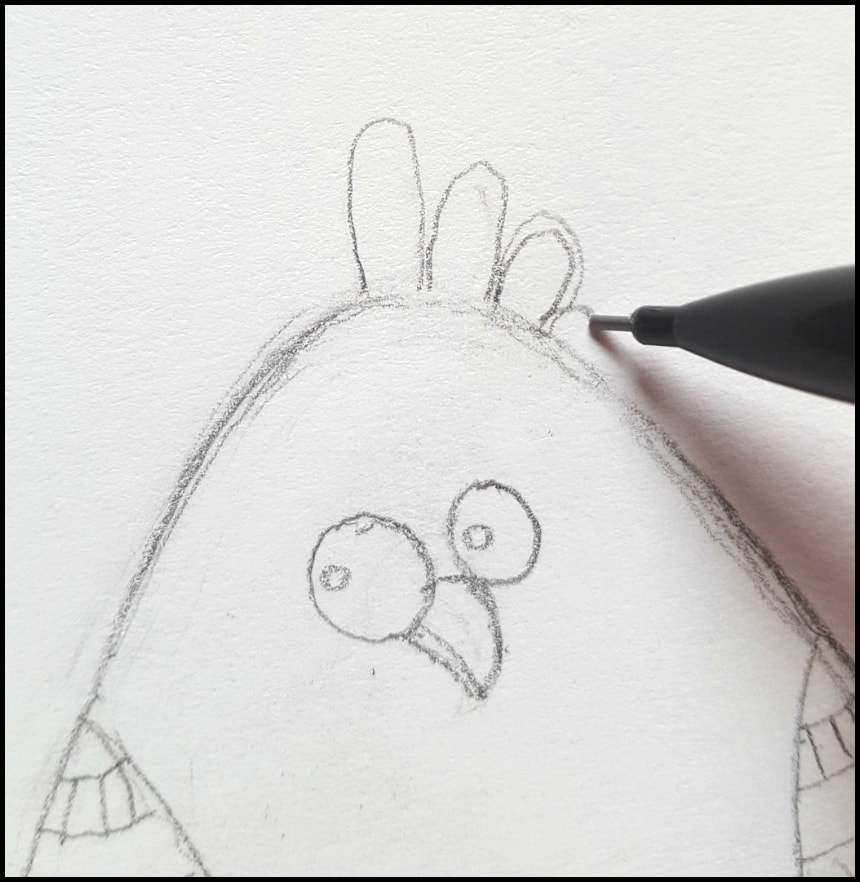
Step 8. The Comb Draw the comb by using skinny ovals (or upside-down 'U's"). Some hens have pretty tall, showy combs, but when you are making a simple illustration, a shorter comb keeps the hen from looking like a rooster. Especially since we can't see the tail.
Step 9. The Nest
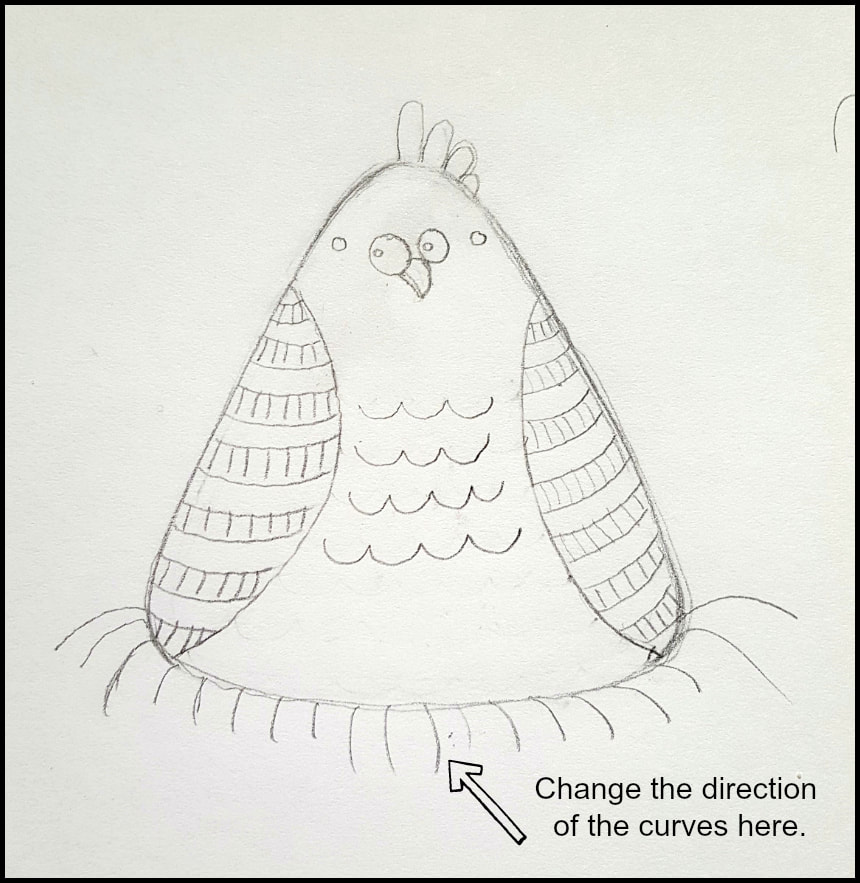
When you look at simple illustrations of nests (or watch any old cartoons) they are shaped like a bowl, with a fluffy bit of straw around the top like a collar. In real life chickens pretty much just wallow a hole out of whatever (even dirt) and lay their eggs. But we are going to make the classic, doodle nest. Start the nest shape by making some curved lines under the chicken's chest/belly. The lines to the left are curved the left, and in the middle you switch and curve the lines to the right. This helps the nest look round and fluffy. Make your straw pieces different lengths and space them a little unevenly. Go in between your first lines and create more straw pieces. Vary them so that some are short and some are long, some are straight, and some are curved. This makes the puffy part of the nest.
Step 10. Bottom of the Nest
Draw two long lines under the edge of your nest top. They follow the shape of the top of the nest, or the chicken's body. This is the "bowl" shaped part of the nest.
Go in between the long lines and add some shorter lines to create the woven nest look. You can add as many or as few as you like to create texture.
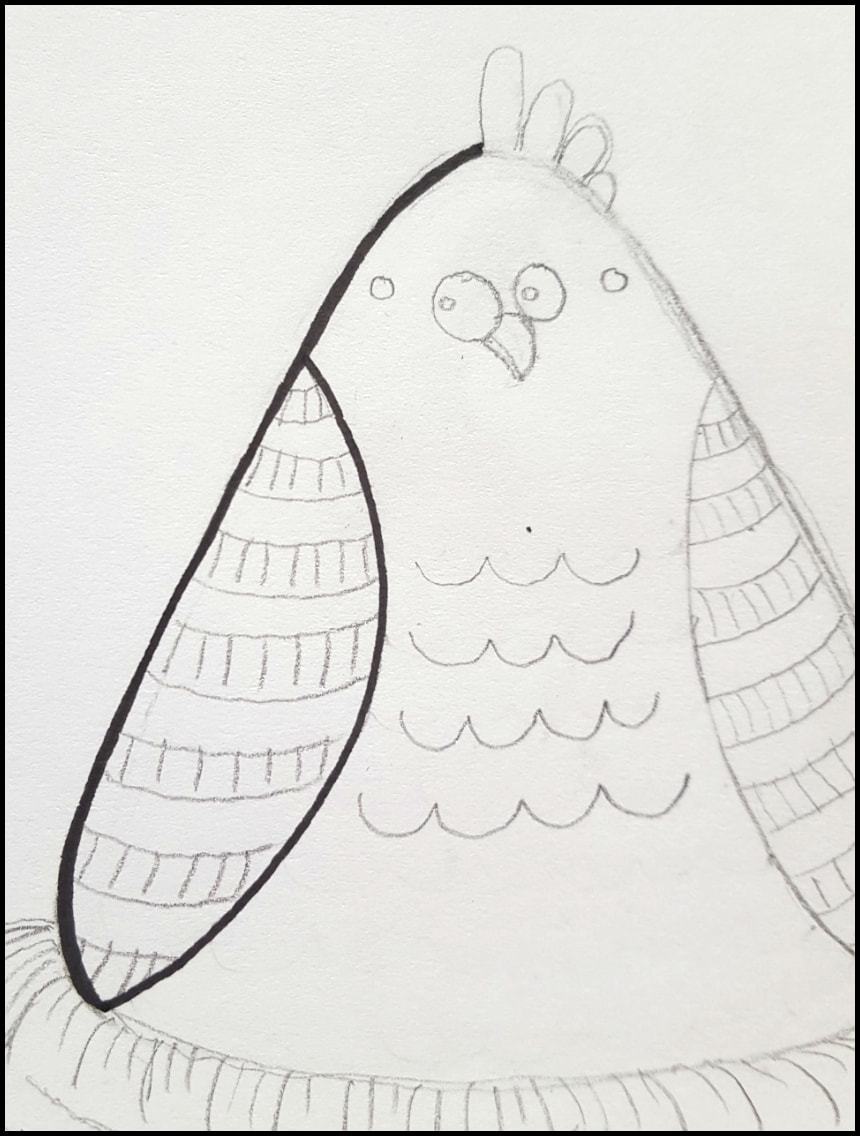
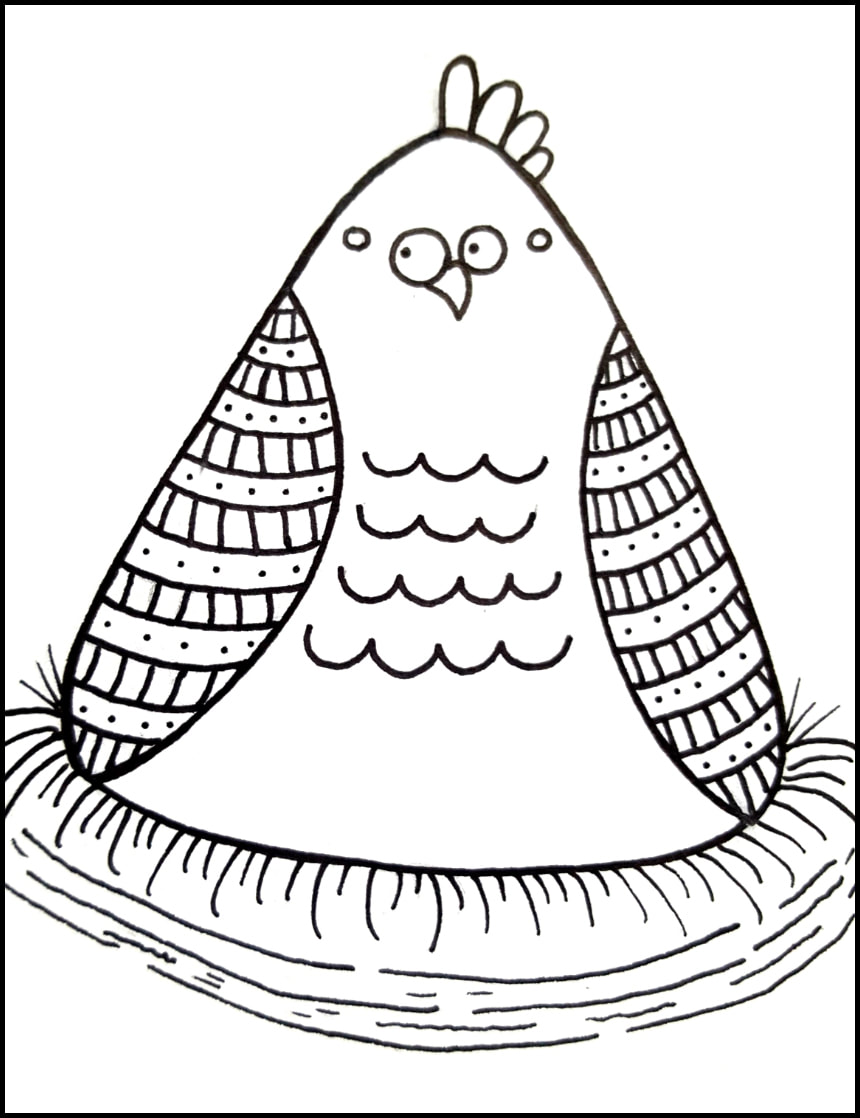
Step 11. Inking In Your Lines
Ink your drawing in by carefully tracing your pencil lines. This is a good time to correct any crooked lines made with pencil.
Once the lines the ink has dried for a few minutes, you can erase your pencil marks.
Now your chicken should look something like the photo above.
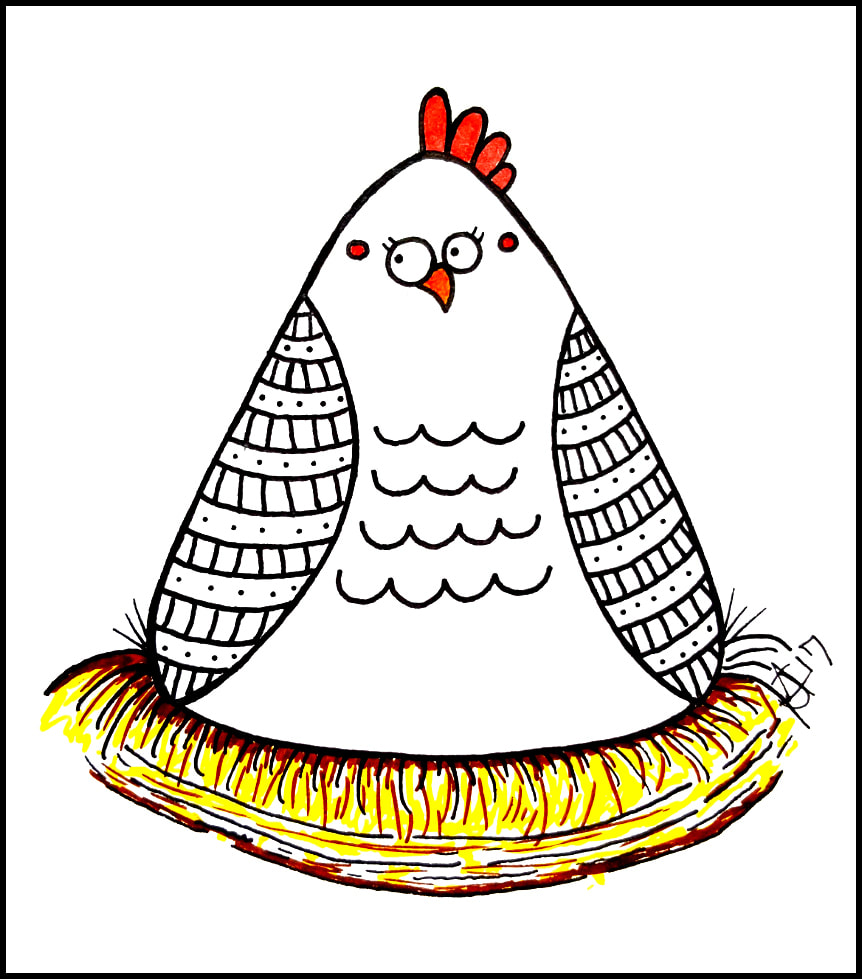
Step 12. Color it In
Using your favorite coloring tools ( I used Crayola markers for this one) make your chicken as plain or colorful as you like.
Why Doodle?
So, are doodles good for anything? Well, they are great practice. They can also be a cheap, portable form of stress relief.
But you can also use the little motifs for a variety of other projects. For decoration or customization , draw them on or in:
Or, if you use just your inked outline as a pattern, they can be painted, woodburned, or embroidered, too.
Did you like this tutorial? If so, please feel free to share with other doodler's you may know. You might also like this tutorial on How to Draw a Simple Fish Doodle.
1 Comment
12/13/2023 10:50:27 am
I love your chicken drawings! Will definitely give it try. Sounds like fun. Leave a Reply. |
Archives
March 2024
|


 RSS Feed
