 In today's tutorial, I will walk you through some easy steps for drawing a cute, Valentine's Day love potion doodle. The step-by-step photos are easy for anyone to follow. If you can draw a few simple shapes, like ovals, straight lines and hearts, then you can doodle this! Things You Will Need:
Okay, let's draw! Step 1. Draw an smushed oval to be the top of the bottle. You can make this any size you want, but remember that the rest of the bottle is much bigger, so leave yourself plenty of space. I'm drawing the lines with a plain, yellow school pencil. To make your lines easier to erase easier, use a very light touch when drawing. 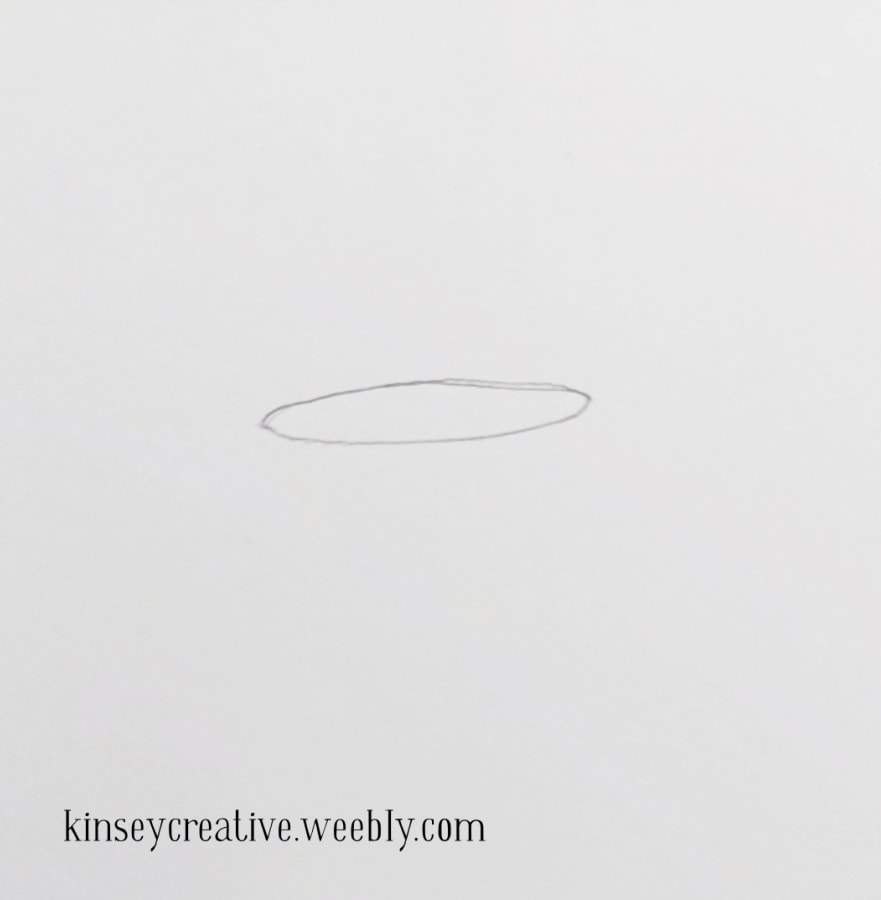 Step 1 Step 1 Step 2. Draw two straight lines that slant slightly inwards. Since this is a simple doodle, don't worry too hard about making everything perfectly straight or even. 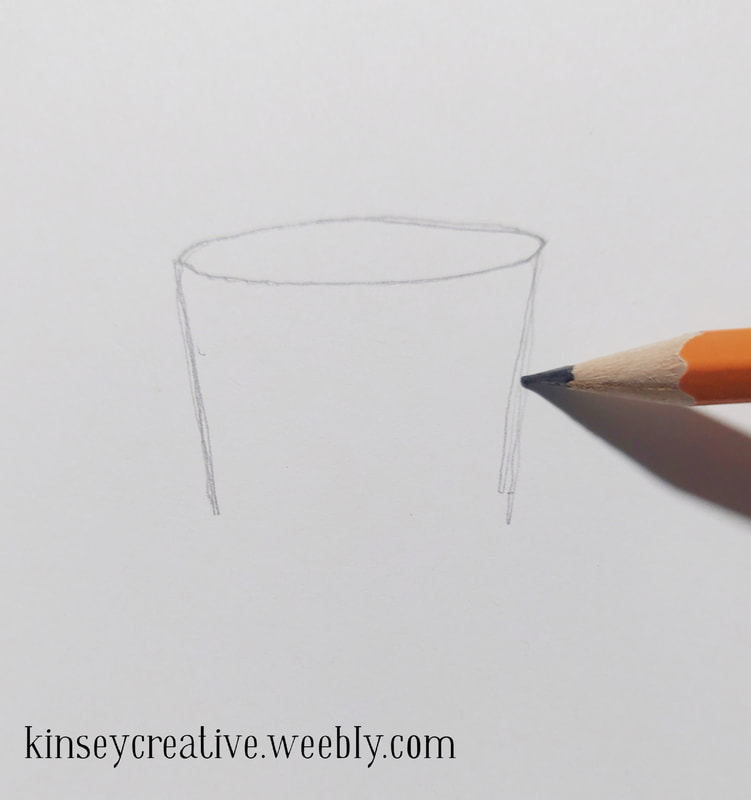 Step 2 Step 3. Connect the two side lines with a slight curved (smiley face) line at the bottom. Now you have what looks like a small cup or bucket. This is the neck of the bottle. 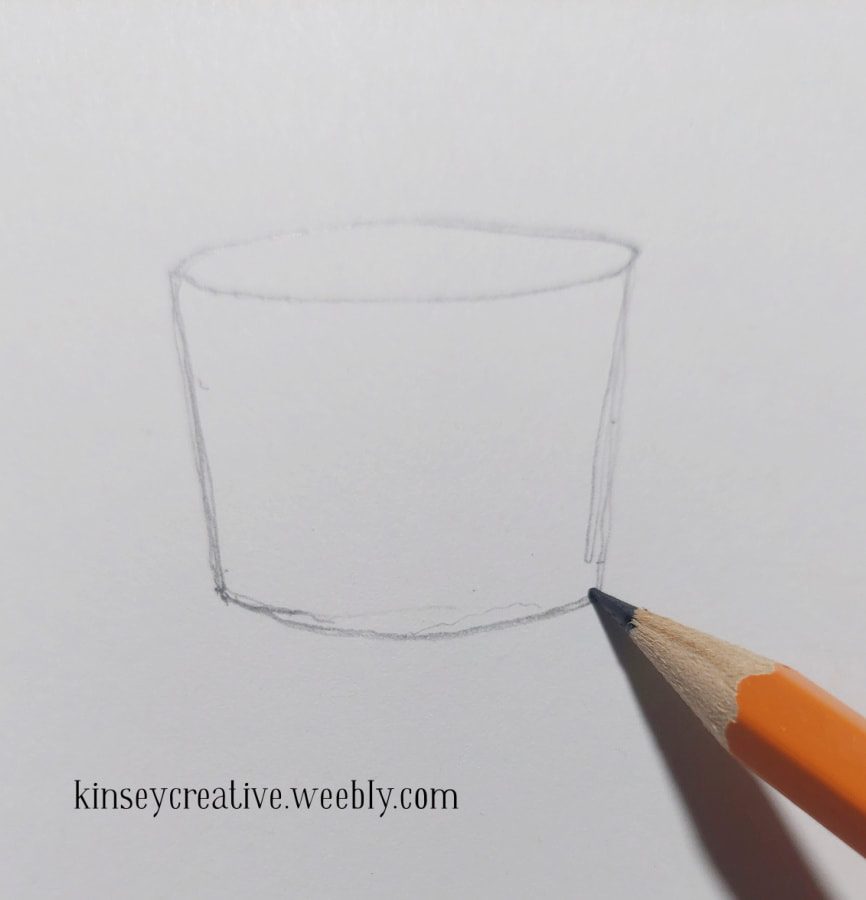 Step 3 Step 4. Again, come down with slanting lines from the bottom of that curved line. This is the body of the bottle. How long these lines are will be how tall the bottle is. You can make yours shorter or taller than mine. You can also make the bottle wider or narrower by adjusting the angle of the lines. If you look close at the image below, you will see the line is not perfectly straight. There is a slight curve towards the bottom. This makes it look more rounded. 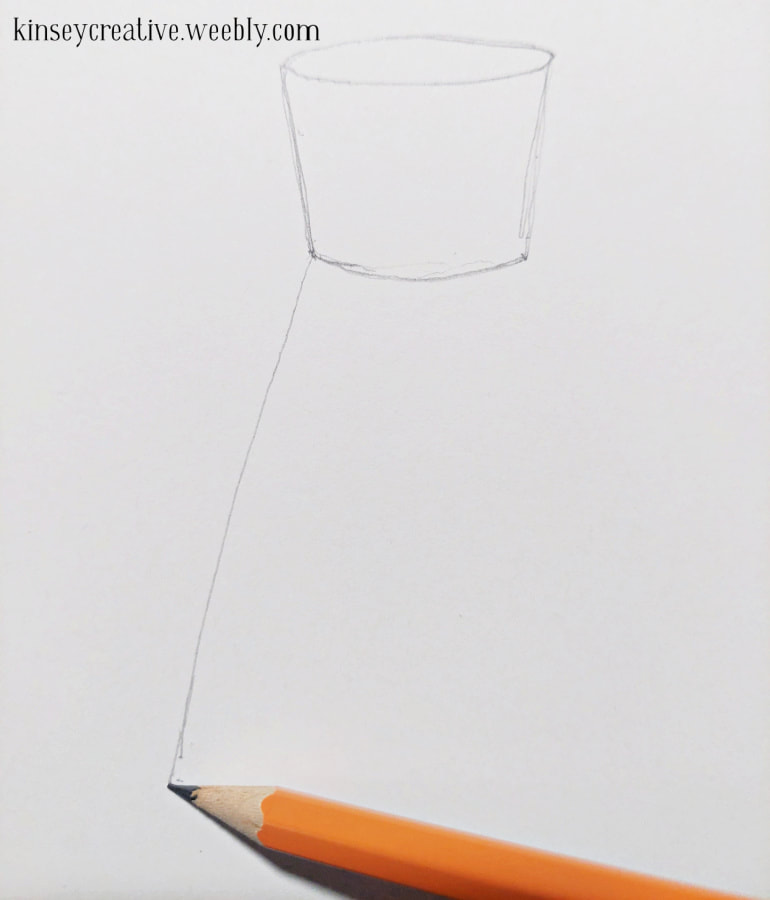 Step 4. The sides of the bottle Step 5. Connect the sides of the bottle with a slightly curved line for the bottom. (Just like in step 3.) 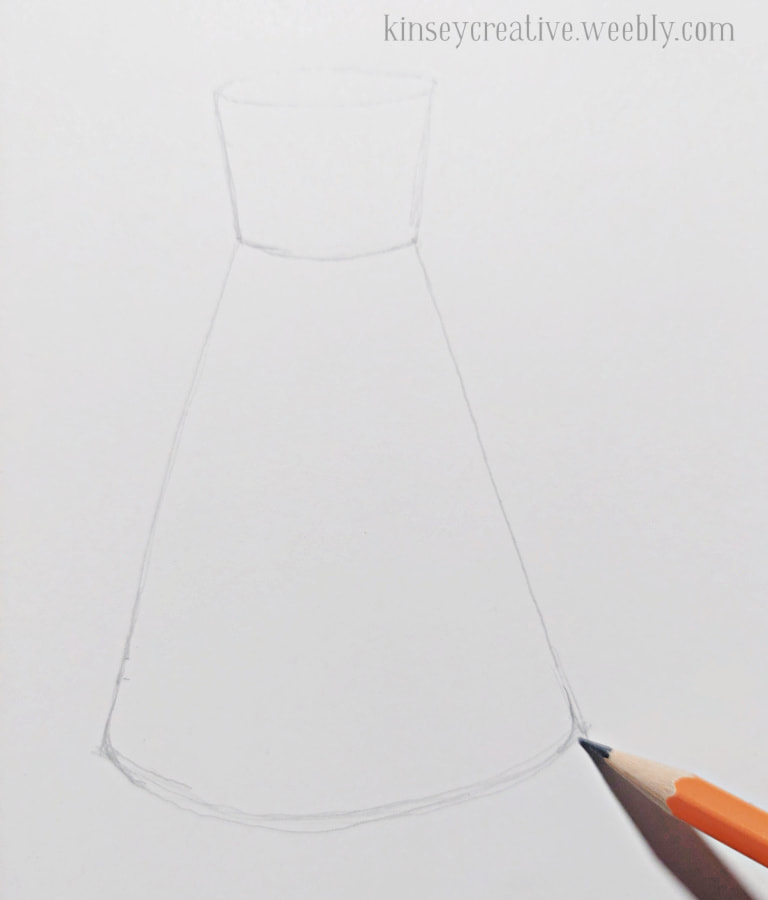 Step 5 Step 6. This is a little trickier. Where the sides of the bottle meet the bottom, make a curved line that is opposite to the one you drew for the bottom. This creates another "smushed oval" shape, just like the one for the mouth of the bottle. 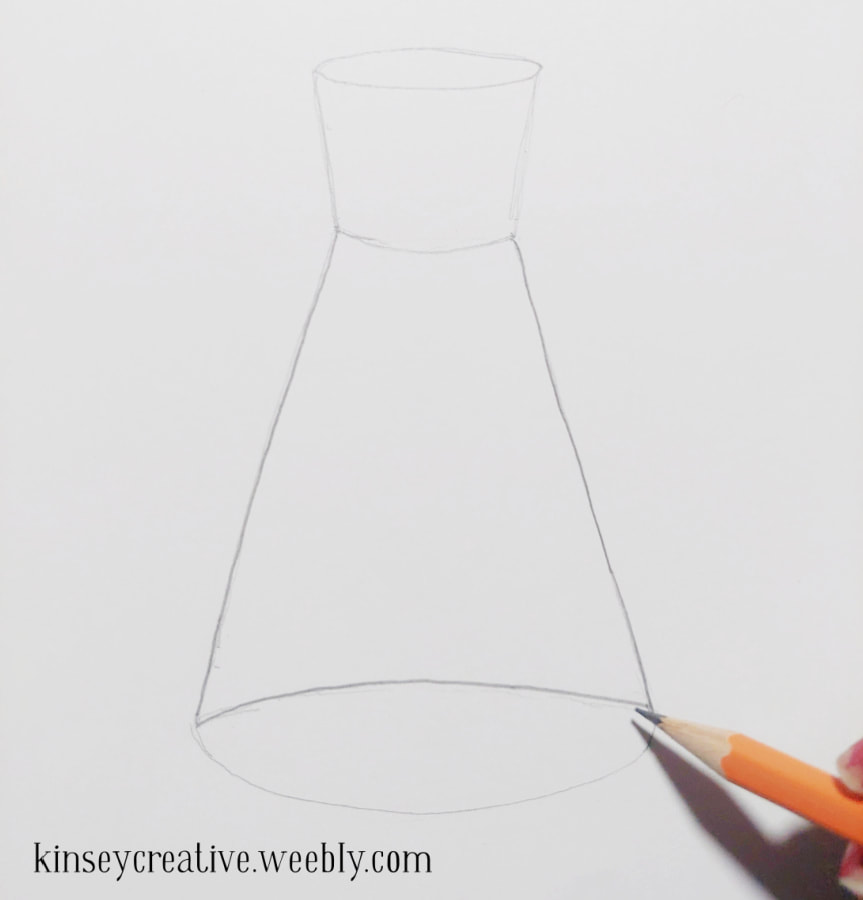 Step 6 Step 7. This step is basically like step 6, except at then neck of the bottle. Draw a curved line so that once again you have that flattened oval shape. Now the bottle looks more "see-through". 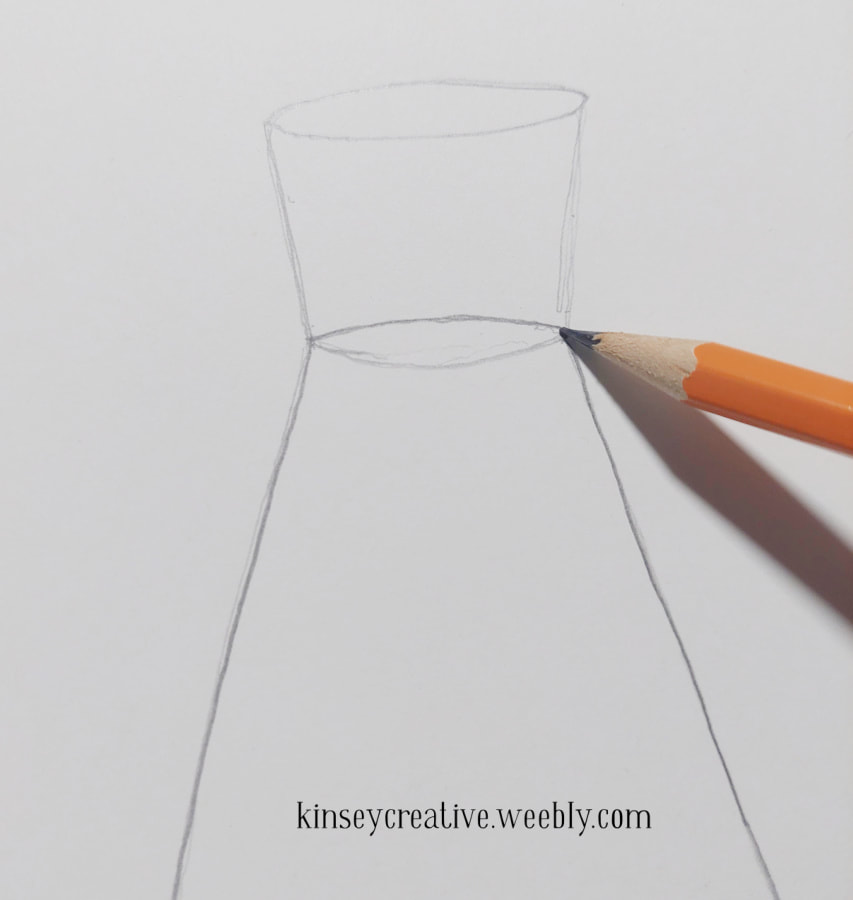 Step 8. Fill the bottle with hearts! You can get creative here, using hearts of different sizes and shapes. I added small open circles to look like bubbles or confetti dots. You could also add "X's" and "O's". Turn your paper while drawing to make it easier to draw sideways and upside down shapes. Overlap some of the hearts and other shapes to help it look more "3D". Once you have as many hearts as you want in the bottle, it is time to ink it! 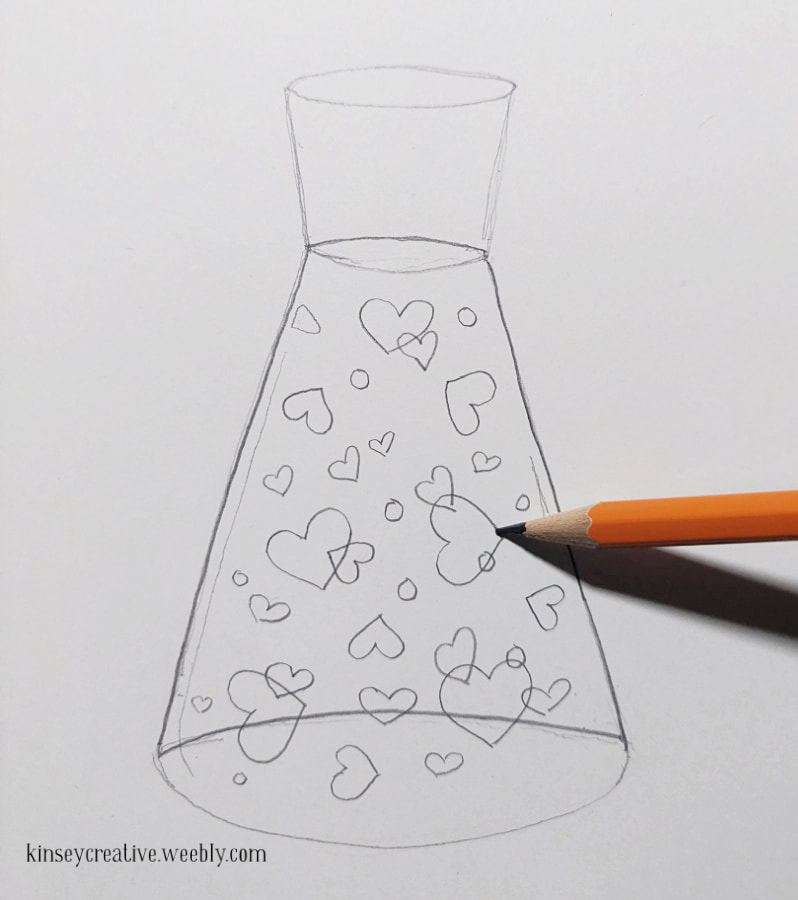 Step 8. Drawing hearts Step 9. Grab your ink pen and carefully trace over the pencil lines that you want to keep. Be careful in places where the lines that are supposed to be 'behind' overlap your other shapes. While inking you can even things up or change details if you want. Once the ink is dry, take an eraser and gently erase the leftover pencil lines. 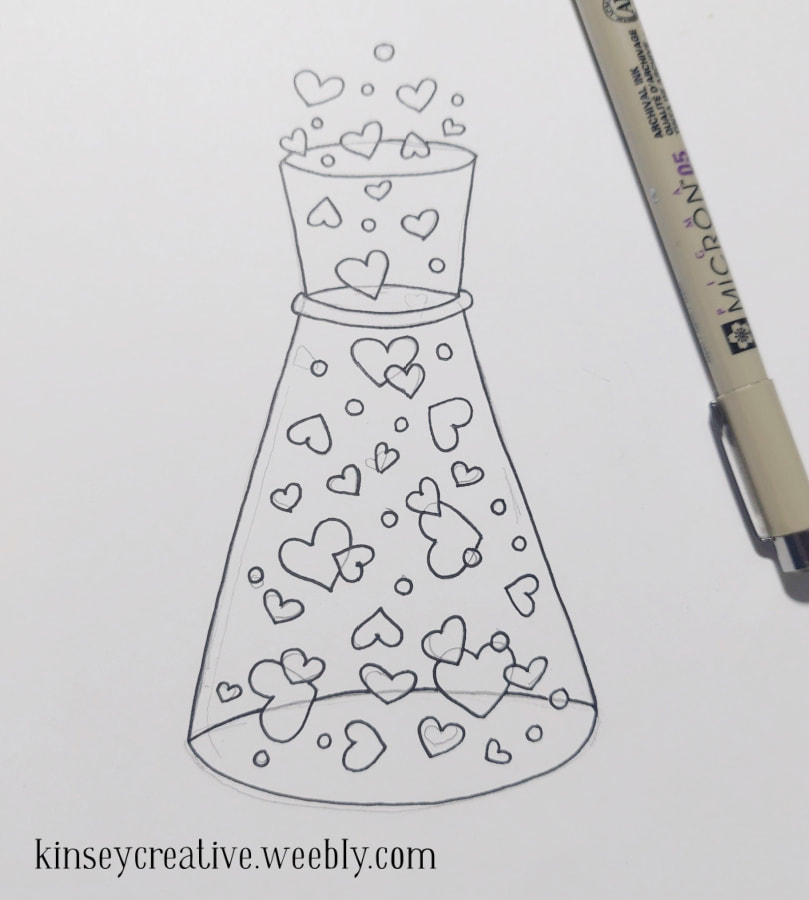 Step 9. Inking the outline, with pencil lines still showing. 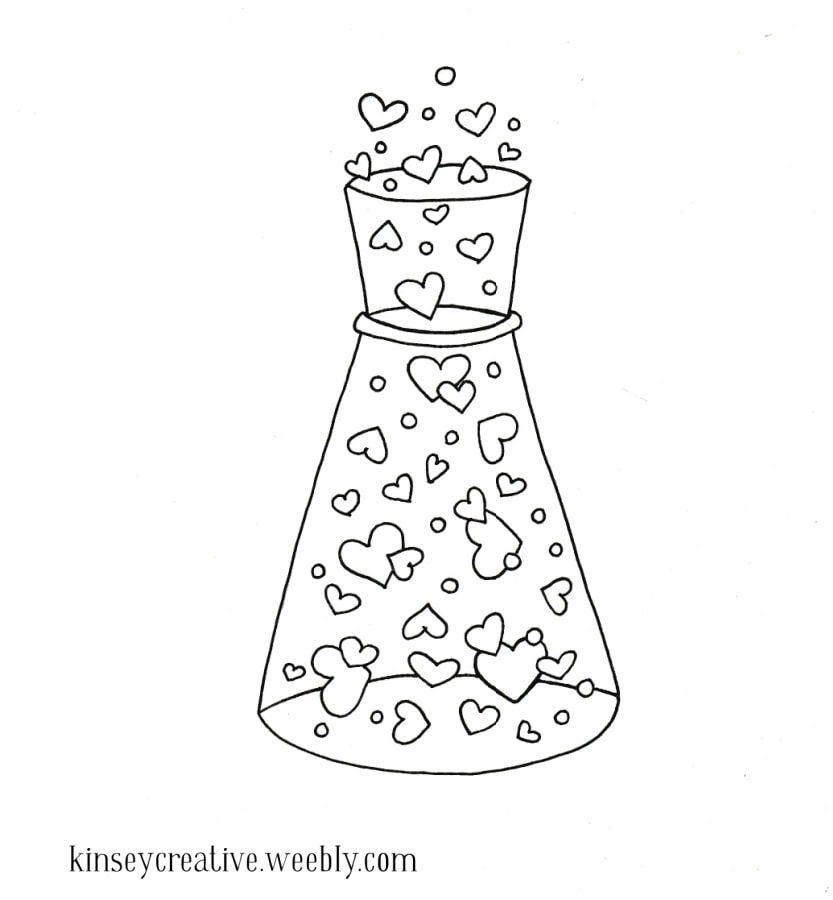 Step 9. After erasing. Nice clean line art! Step 10. Now all you have to do is color it in. You can use whatever supplies you like best; marker, colored pencil, watercolors, etc. I always recommend testing them on a scrap piece of the paper before coloring your drawing. Not all papers and coloring supplies get along well. You could also leave it as simple line art with no color. This is always a fun option in a journal where you can color it in later. In my example, I just used an editing program to fill in the colors after scanning my drawing. 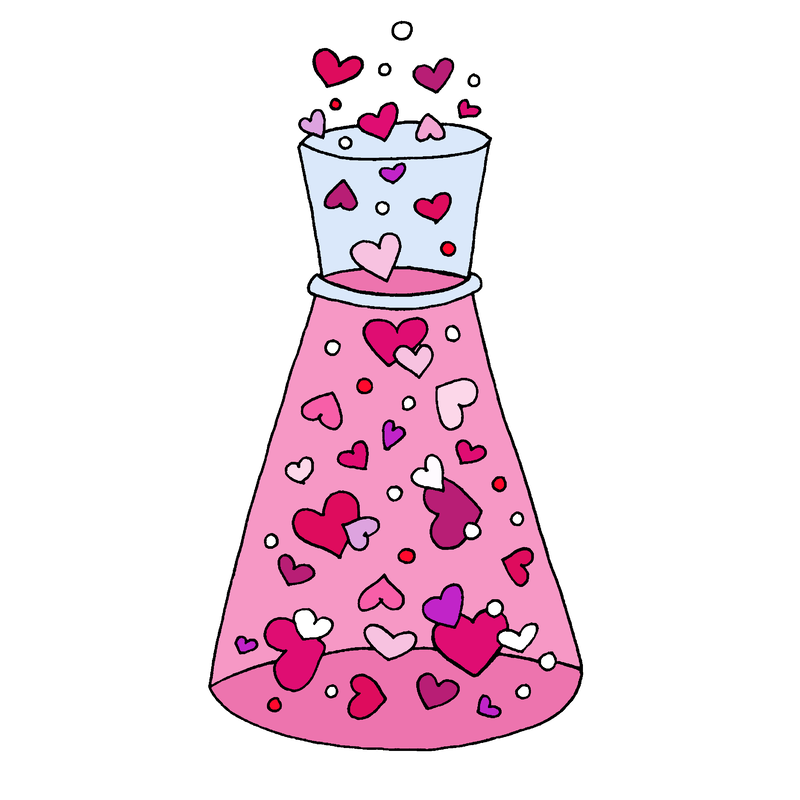 Step 10. Color your drawing And there you go. I hope you enjoyed the tutorial, and had fun creating your own love potion doodle. What can you do with a finished drawing?
0 Comments
Leave a Reply. |
Archives
March 2024
|

 RSS Feed
