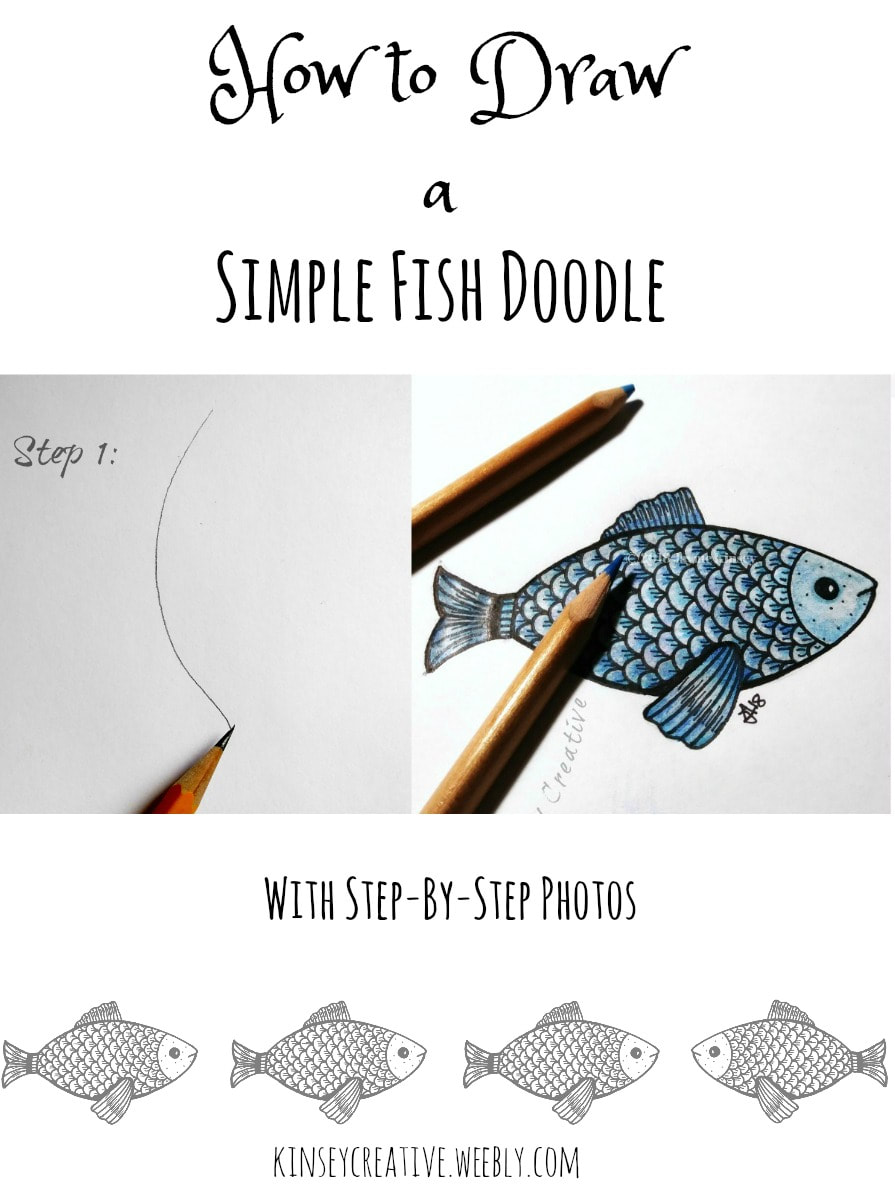
Ready to try it for yourself? Keep reading for instructions, photos, and a list of materials! Happy doodling!
Materials:
You can doodle with just about anything you have lying around. Even a Bic pen on a napkin! So, now that you have your stuff, here are the step-by-step photos. 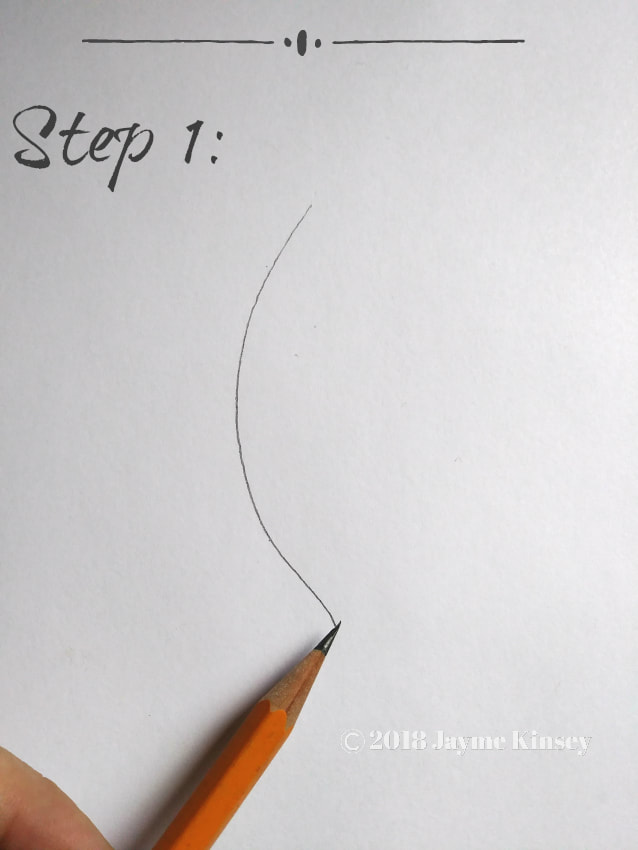
Step 1
Step 1:
With a nice, sharp pencil, draw a long curved line. Its very much like drawing one half of a simple leaf shape. Or, you can think of it as an exaggerated parenthesis. NOTE: If you want to ink your drawing in later, use much lighter pencil marks than I did for these photos. It will make erasing the graphite a LOT easier. 
Step 2
Step 2:
This part is optional but it can really help. Draw a faint line connecting both ends of the curved line. This will be the midline of your fish, and it will help you line up the next part. 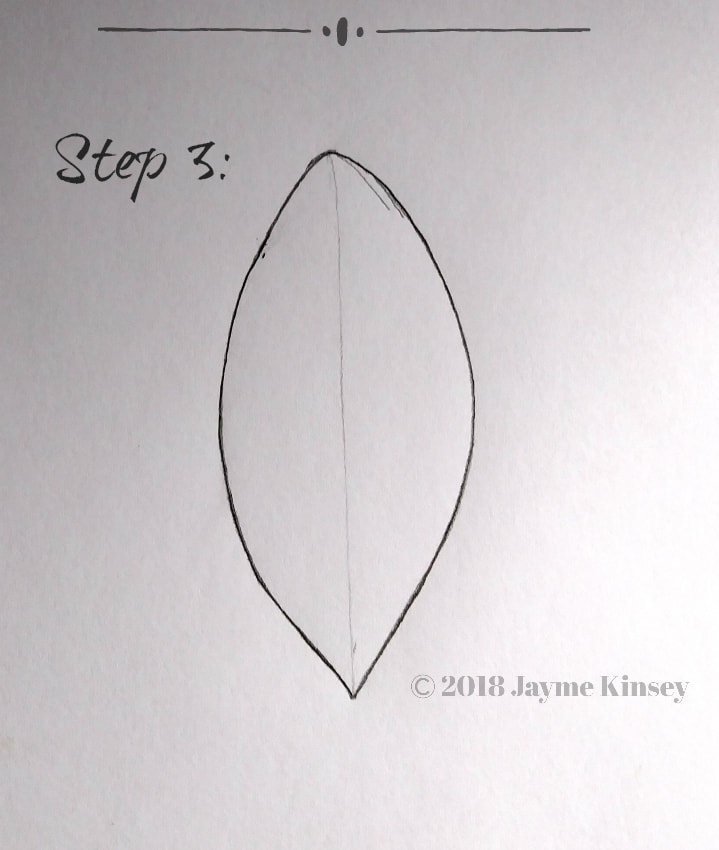
Step 3
Step 3:
Draw a similar curved shape on the opposite side of your center line. See? It looks like a leaf. 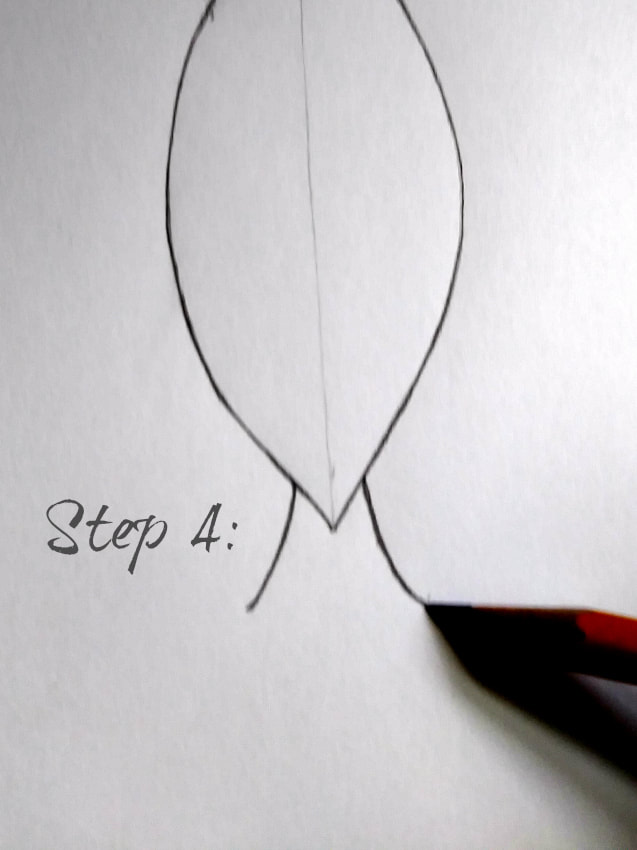
Step 4
Step 4:
Decided which end of your leaf shape is going to be the tail. Then draw two slightly curved lines of any length to create the tail flare. Notice that it looks like the letter "M", if you are having trouble getting the lines even. Just try to make a nice, even "M". 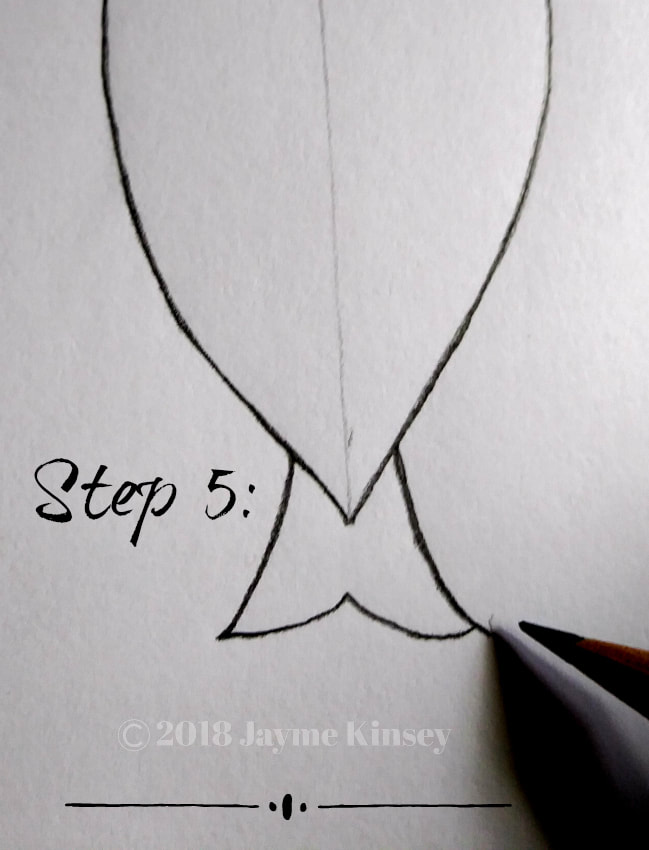
Step 5
Step 5:
Connect the tail with an upside down "V" shape, lining the point up with the center line. 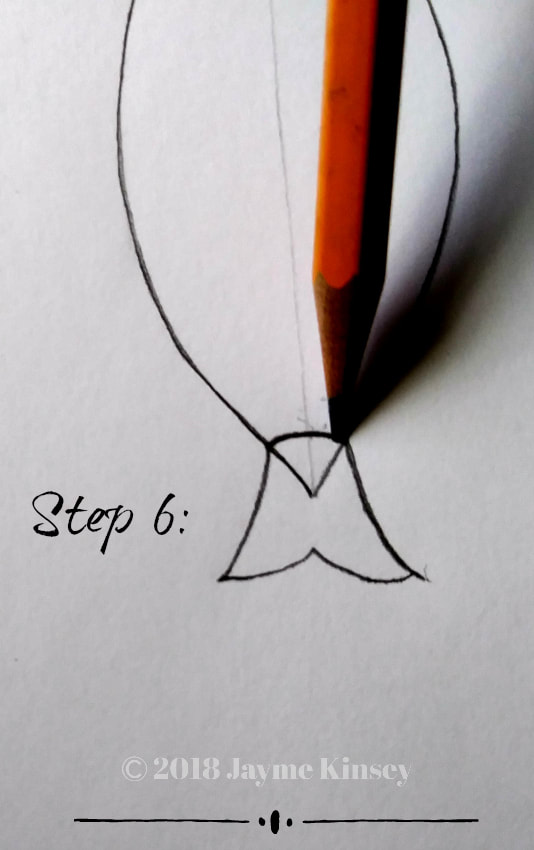
Step 6
Step 6:
Make a curved line where the tail meets the body. 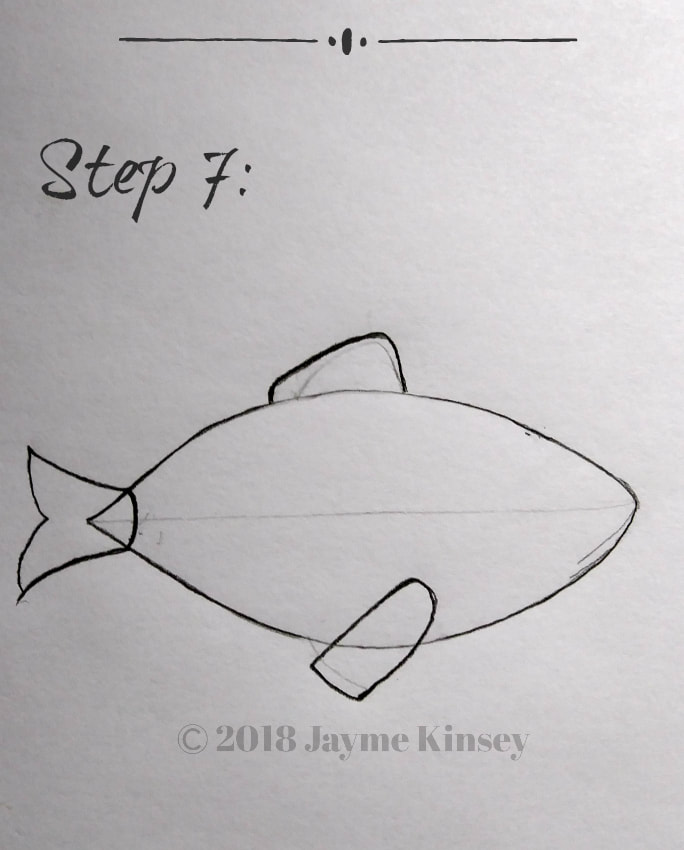
Step 7
Step 7:
Add some fins. These are very "loose" or rounded rectangles. Round off the top of the side fin a little. You can make them any size you like, and flare out them out larger for a showy fish. 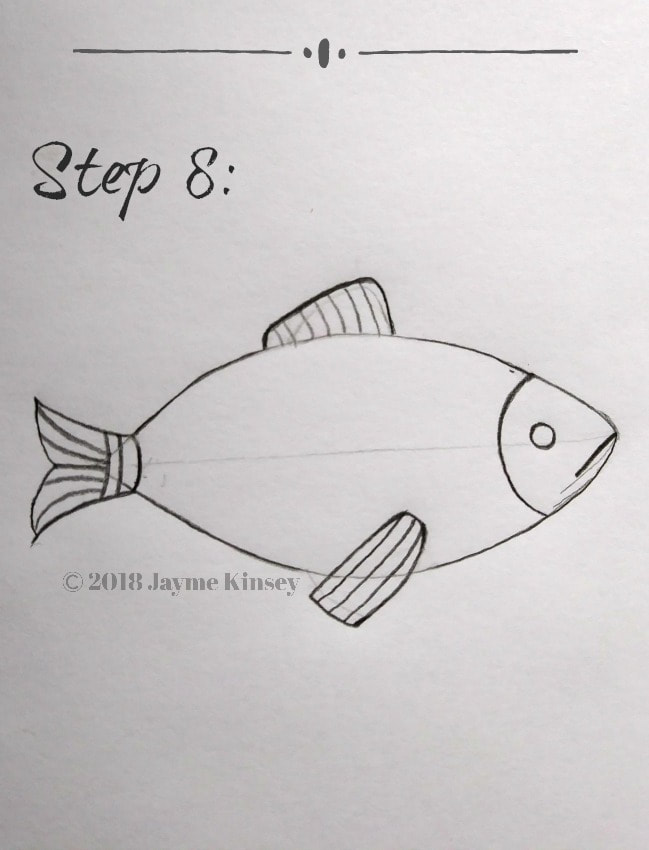
Step 8
Step 8:
Add details such as lines on the fins for texture. Also the eye, mouth and face lines. 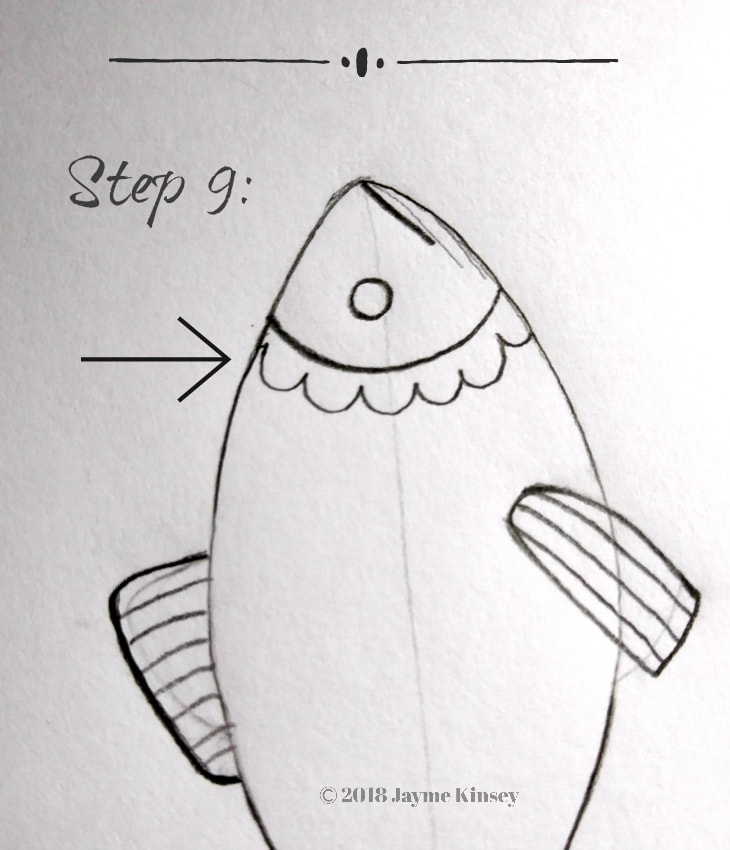
Step 9
Step 9:
Start the scales by making one scalloped line at the neck. 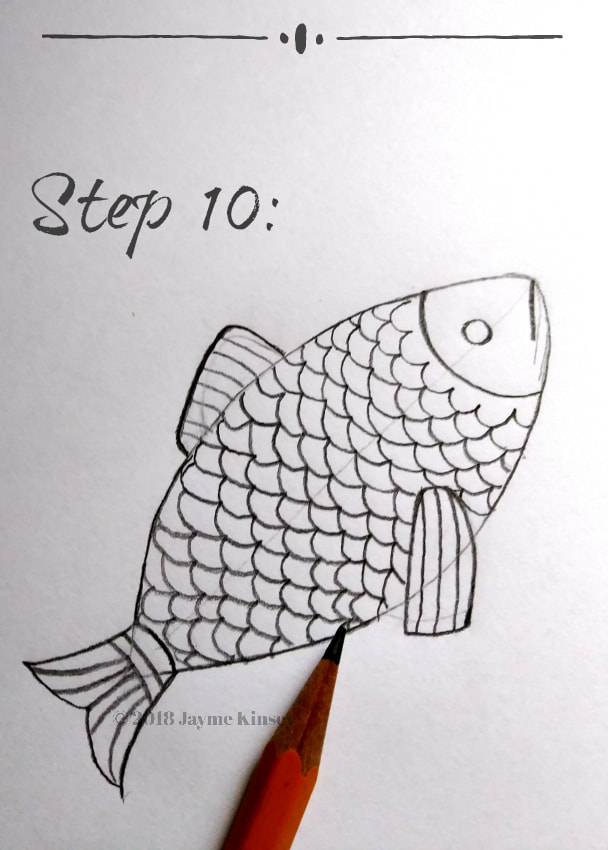
Step 10
Step 10:
Add the rest of the scales. This is pretty easy once you get going. Add the next line so that it touches the first. You might have to make some scales bigger or smaller to work around the shape of the fish and fins. Don't worry about them being too crooked. You can clean them up later when you ink them in. 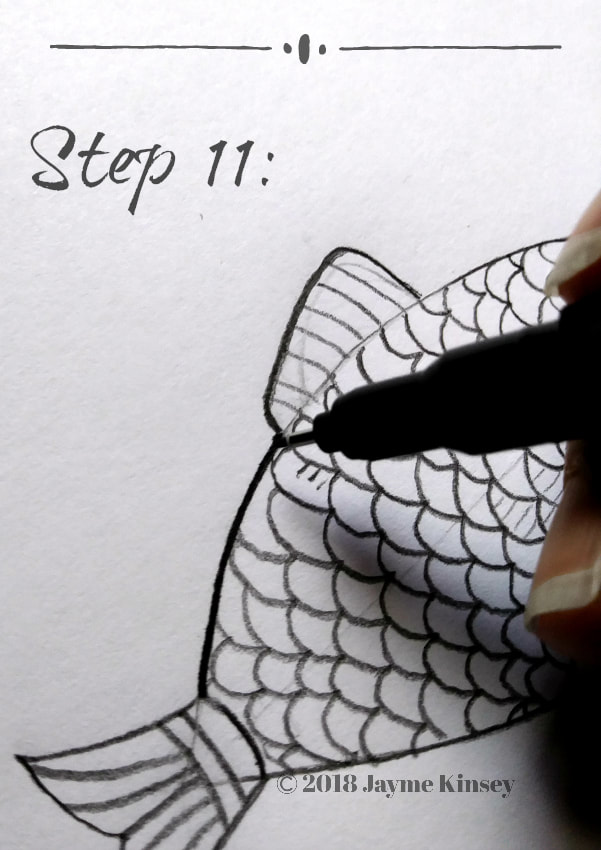
Step 11
Step 11:
Time to ink it in! Be careful to only ink over the lines you want to keep. Ignore the lines you wish to erase such as the center line. Also, you can change up details or straighten out your lines with the pen as you go. Let the ink dry at least one minute before erasing the pencil lines. If you use slicker or shinier paper it may take longer for the ink to dry enough not to smudge. 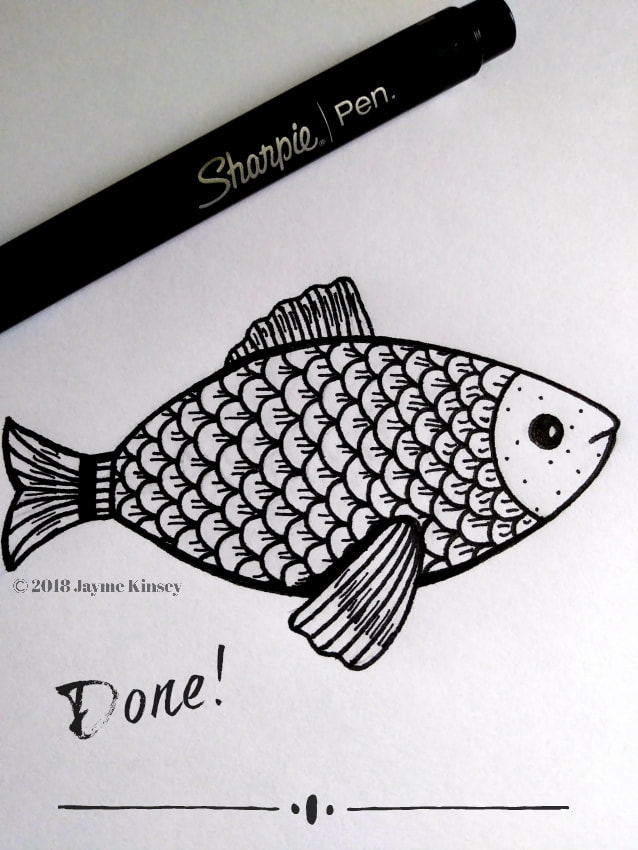
Your fish should look something like this now.
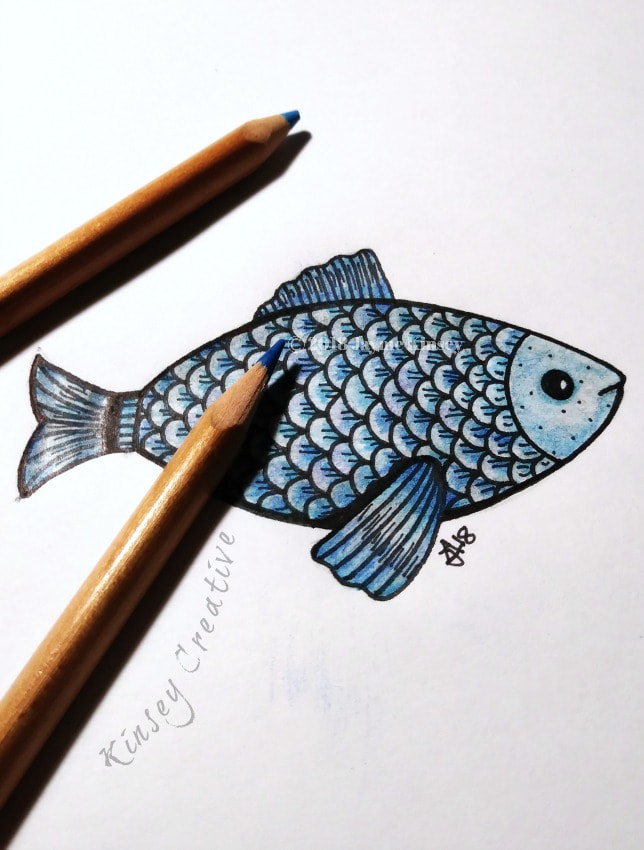
Once the basic shape is inked and cleaned up, you can add details and color it in, if you like. Here it is with colored pencil:
Was this tutorial helpful? If you enjoyed it, please feel free to share it or Pin it for other doodler's to find. Thanks!
And before you go, here is an example of using the same doodle shape to create a completely different scene! 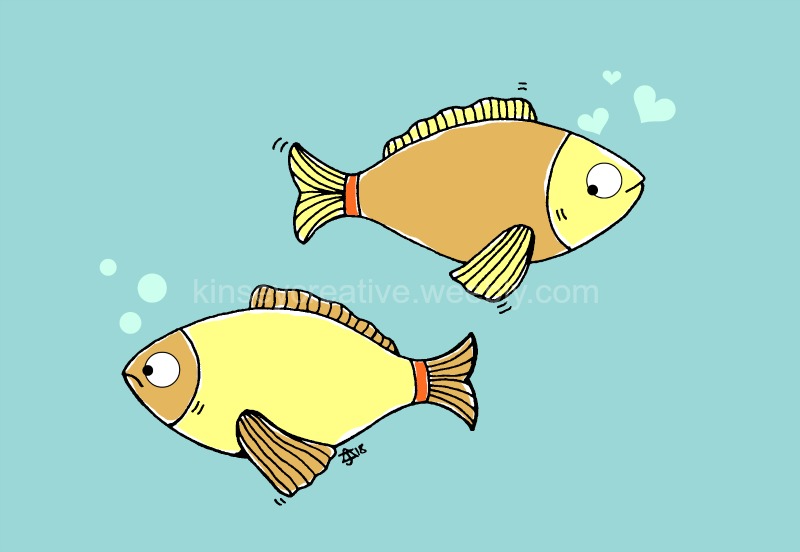
Get thisfish postcard here.
0 Comments
Leave a Reply. |
Archives
March 2024
|
 RSS Feed
