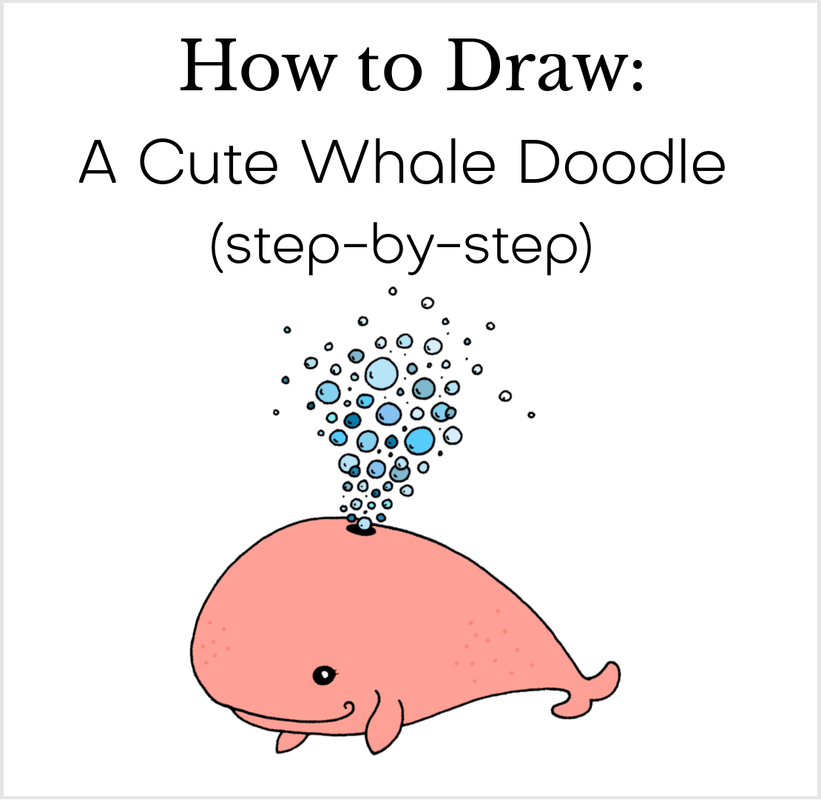
 In this drawing tutorial, I'm going to walk you through drawing a doodled whale. It is a fun design that can be used for journal art, a homemade greeting card or other crafts. And it is really easy, I promise! If you can draw a few basic shapes, then you can draw this cute whale. Ready to try? What You Need:
Note: It always helps to test your coloring supplies (and ink pen!) on a scrap of whatever paper you choose to use. For the photos here, I used simple supplies (nothing fancy). I used a BIC mechanical pencil from the school supply aisle, a Sharpie pen (not marker), and Sharpie markers to color it in. I drew it on cheap copier paper. (I would recommend cardstock over printer paper for markers though.) You can also draw directly into a sketchbook or journal. Okay. Let's draw! 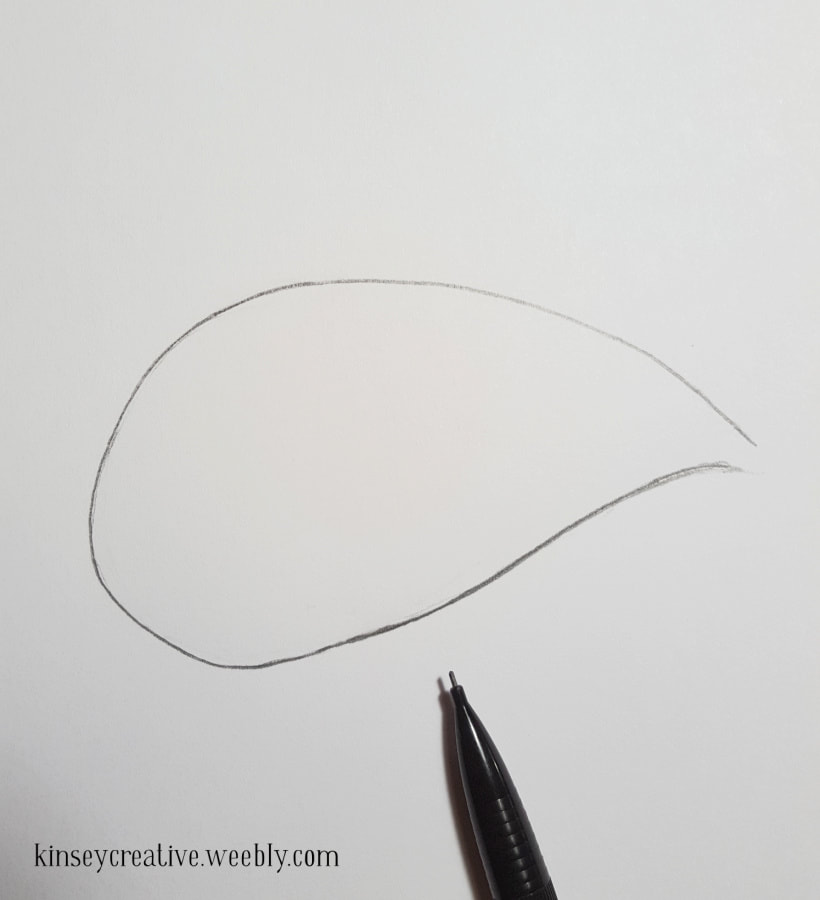 Step 1 Step 1: Draw the Whale Body This is the hardest part. There isn't really a good way to describe that shape, other than it sort of resembles a bag laying on its side. Try to draw a loose, similar shape, that is more rounded on top. It will work out just fine as you add the rest of the details. 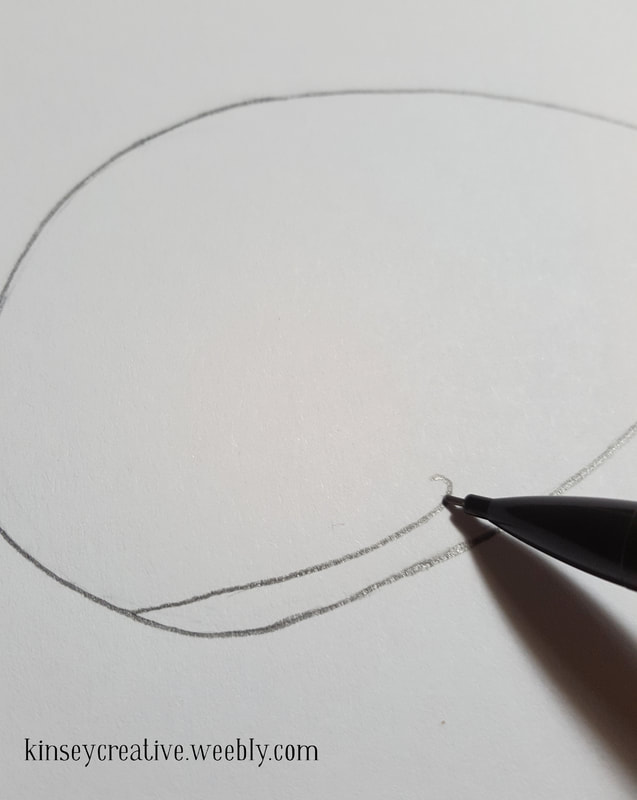 Step 2 Step 2. Draw a Mouth Close to the bottom of the whale's head, draw a line for the mouth. It can curl up on the end like mine or be a more "grumpy" straight line. You can adjust the shape of the whales head to make it look right if needed.  Step 3 Step 3. Draw an Eye Draw an eye for your whale by making a small circle or dot, close to the mouth and set pretty far back. 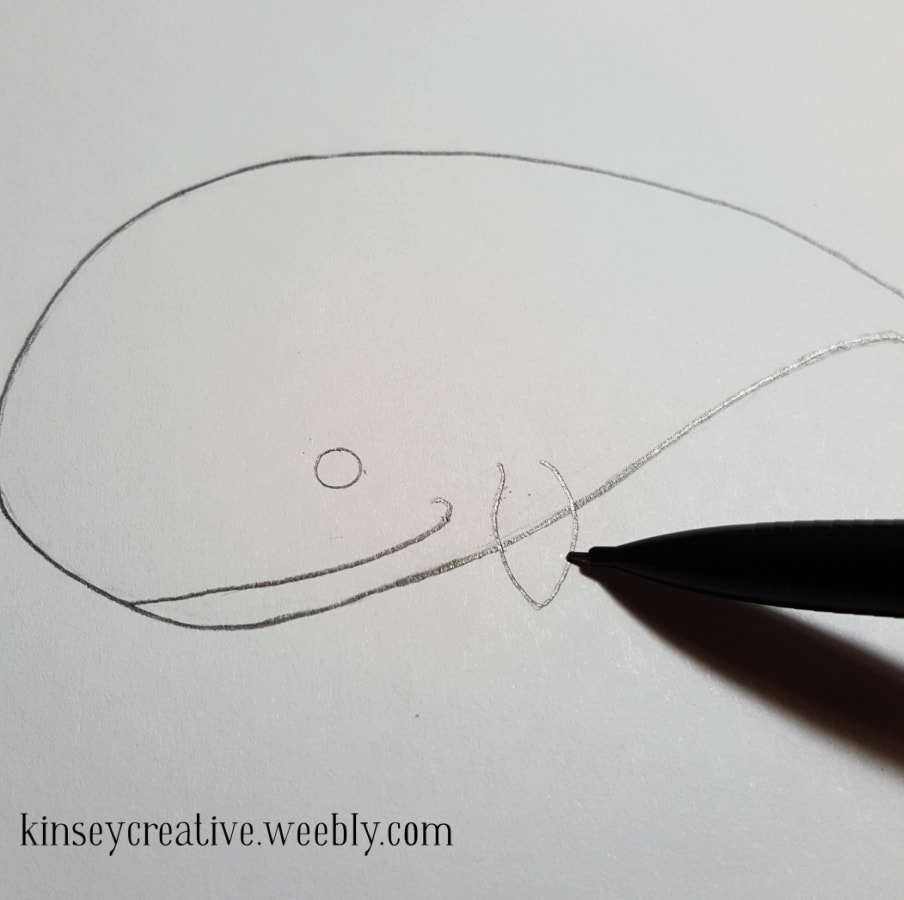 Step 4 Step 4 . Draw the front fin. This is a pointed oval, or leaf shape. I've made them quite small here because it is supposed to be a cute doodle, but you can make your fins larger if you like. 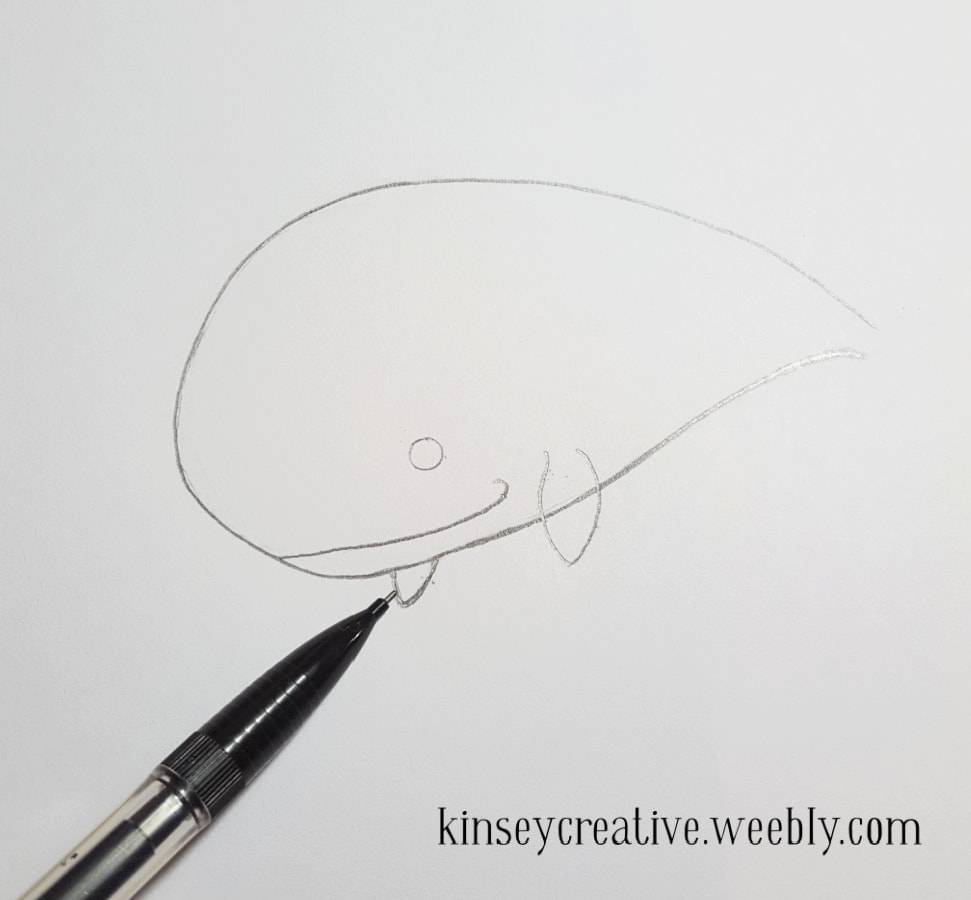 Step 5 Step 5. Draw half of the back fin peeking out from under the whale. It should be roughly the same shape as the one in front, but just a tad smaller, since it is farther away. 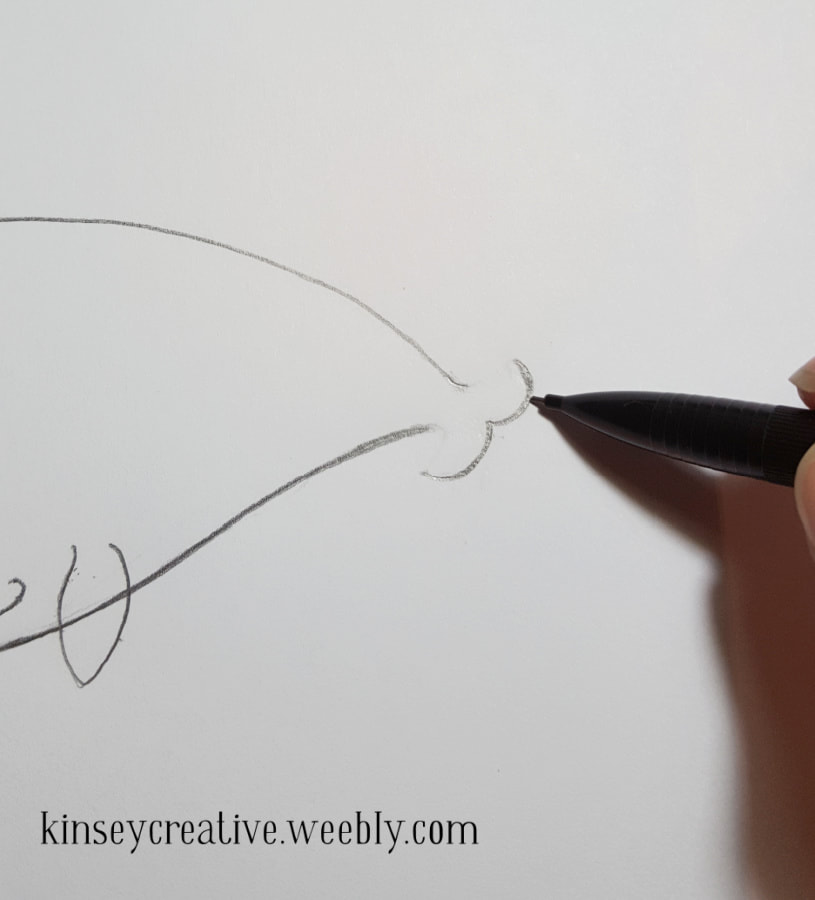 Step 6 Step 6. A Tail For the tail, make backwards '3' near the narrow end of your original body shape. You can then connect the ends of the the fins to the tail with straight or slightly curved lines. (See finished tail in next photo.) 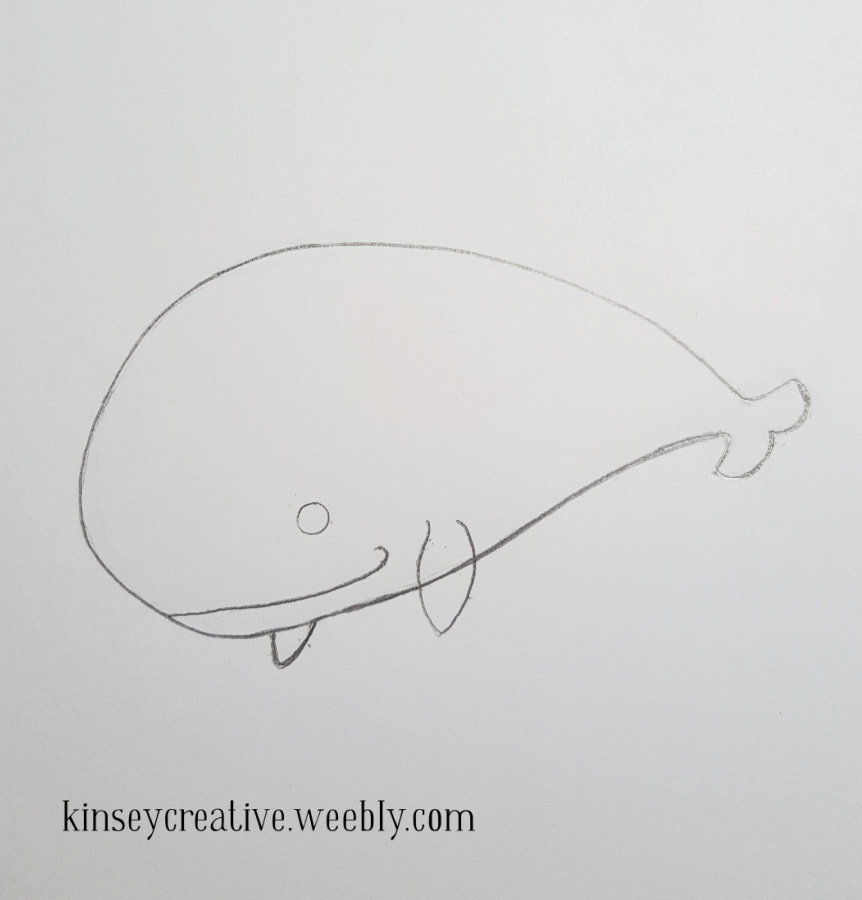 Whale tail 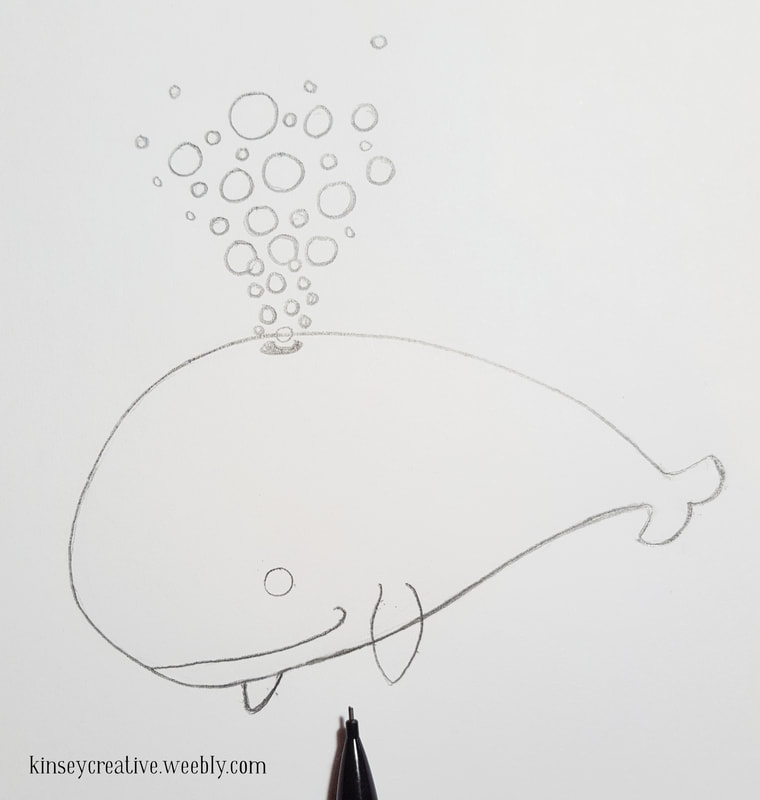 Step 7 Step 7. Draw The Bubbles To begin, make a half circle for the whale's blowhole. Since this is a doodle, it doesn't have to be anatomically accurate. Just sort of line it up with the eye. Then start drawing circles of various sizes to be the bubbles. 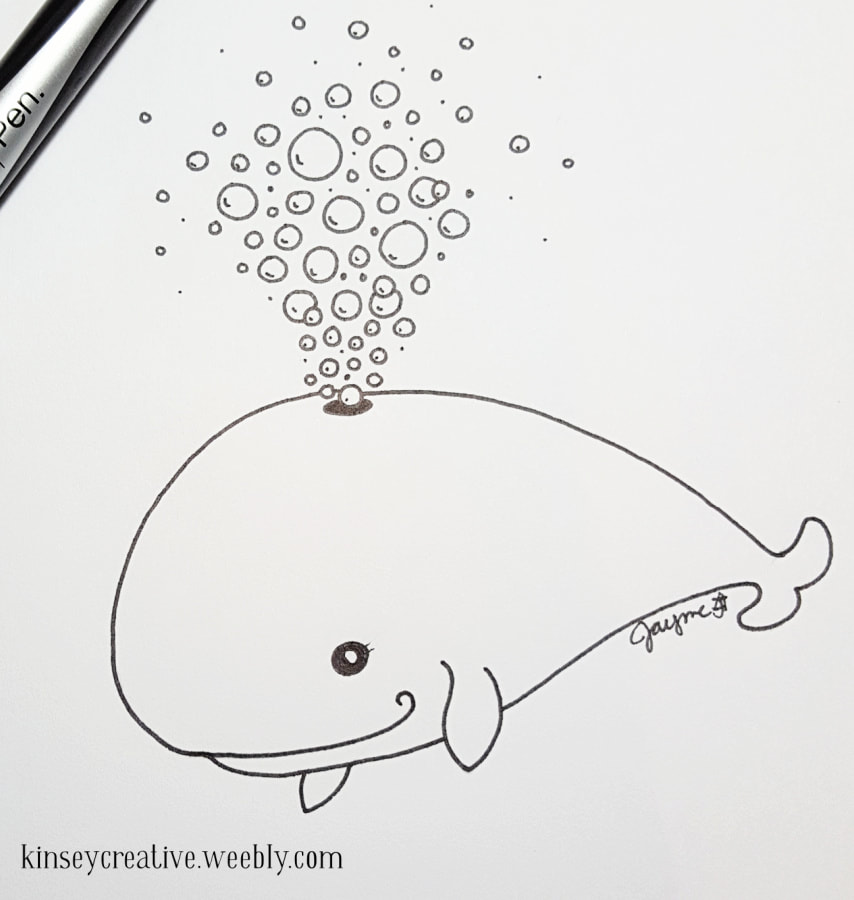 Step 8. Inking your doodle. Step 8. Inking Your Artwork Once you have enough bubbles and are happy with the whale, it is time to ink the outline. If you don't want to ink, you can darken your pencil lines and clean up any messy bits. For this I'm just using a standard Sharpie pen, but just about any pen would work. Carefully trace over ONLY the pencil lines you want to keep. (Note the whale's stomach line across the side fin. You wouldn't want to keep that, so don't ink over it.) Once the ink has fully dried ( so it won't smear) gently erase all the leftover pencil marks so you have a nice, clean outline. 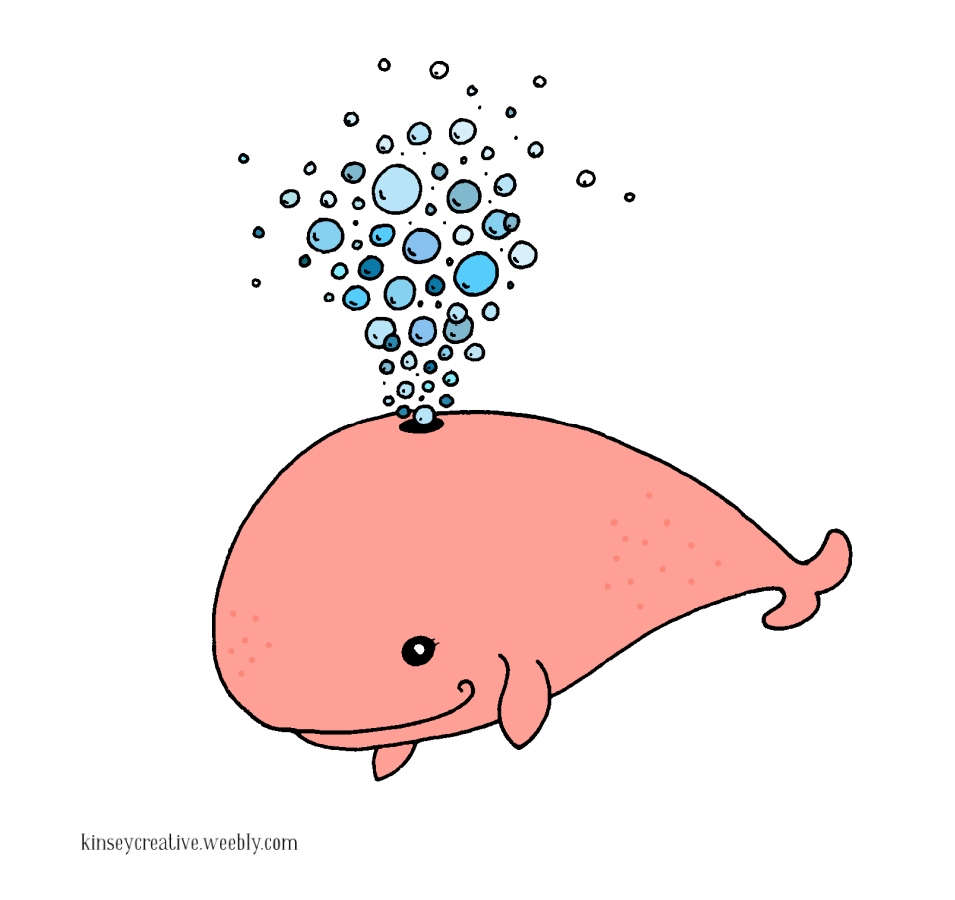 Step 9 Step 9. Coloring Your Art
You can use any coloring tools you prefer: Markers, colored pencils, crayon, watercolors...it is up to you! For the best results (and less frustration) test your coloring supplies on a scrap piece of your drawing paper to see how it will look. If your paper is too rough, colored pencils might not look smooth enough. If it is too thin, watercolors or markers may cause it to warp. *In the process of moving this tutorial from my old, dead blog to this one, I lost the last photo from this tutorial showing the whale colored with sharpie marker. I recreated it for this updated tutorial version by scanning and coloring it in an editing program. * Whale, there you have it! I hope you enjoyed the tutorial, and had fun drawing your own doodle. If you liked this drawing tutorial, you might like some of my other 'how to draw' posts: How to Draw a Valentine Mushroom Doodle How to Draw a UFO doodle How to Draw a Chicken Doodle
0 Comments
Leave a Reply. |
Archives
March 2024
|
 RSS Feed
